
Survey In Salesforce
minutes read
Salesforce Surveys
Salesforce Surveys has been released in the Spring’18 Release. This enables you to make excellent, easy-to-use forms for collecting feedback and data from your clients. Different types of inquiries can be added to gather the data you need. All your profitable review information is stored in your organization, so you can tackle the intensity of Salesforce to see information, make reports and dashboards, and offer experiences with your organization. This feature is generally available in Classic and Lightning Experience.
1. Enable Surveys and choose your Community where the Survey will be embedded.
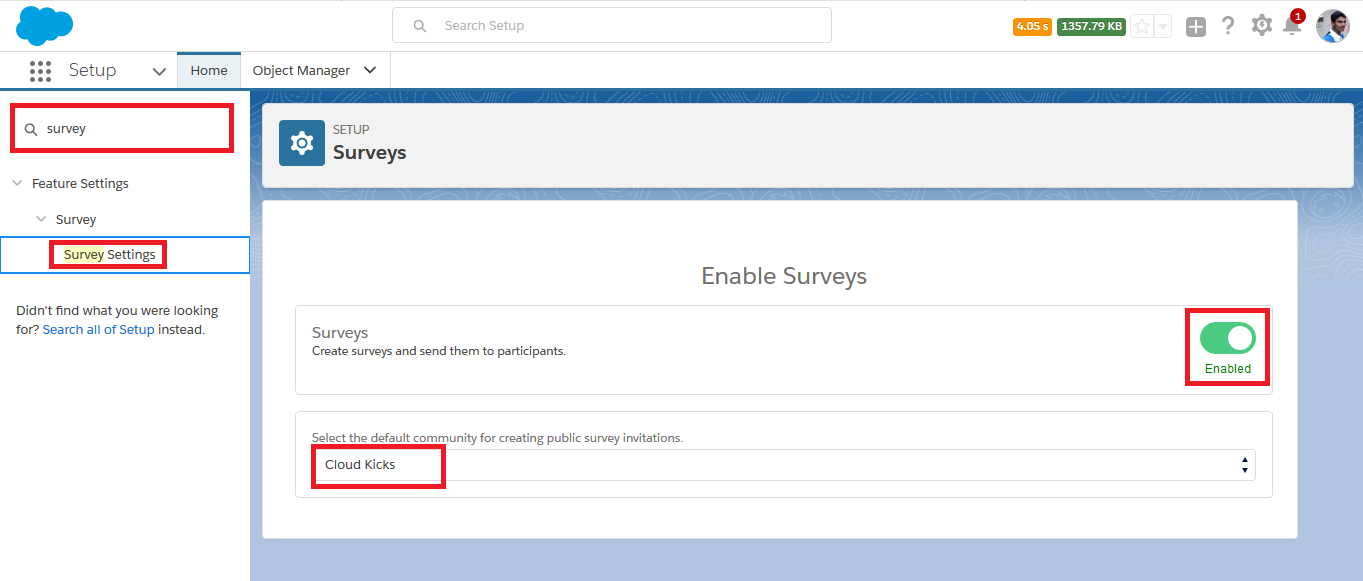
You can create one trial survey without additional permissions, so you don’t need to assign a Permission Set to a user to create a single survey. Create a survey Permission Set and assign it to users only if users plan on creating multiple surveys in your Org. To create multiple surveys, contact your Salesforce representative to purchase licenses for Salesforce Surveys.
2. Create Permission Set to enable permissions to create Survey.
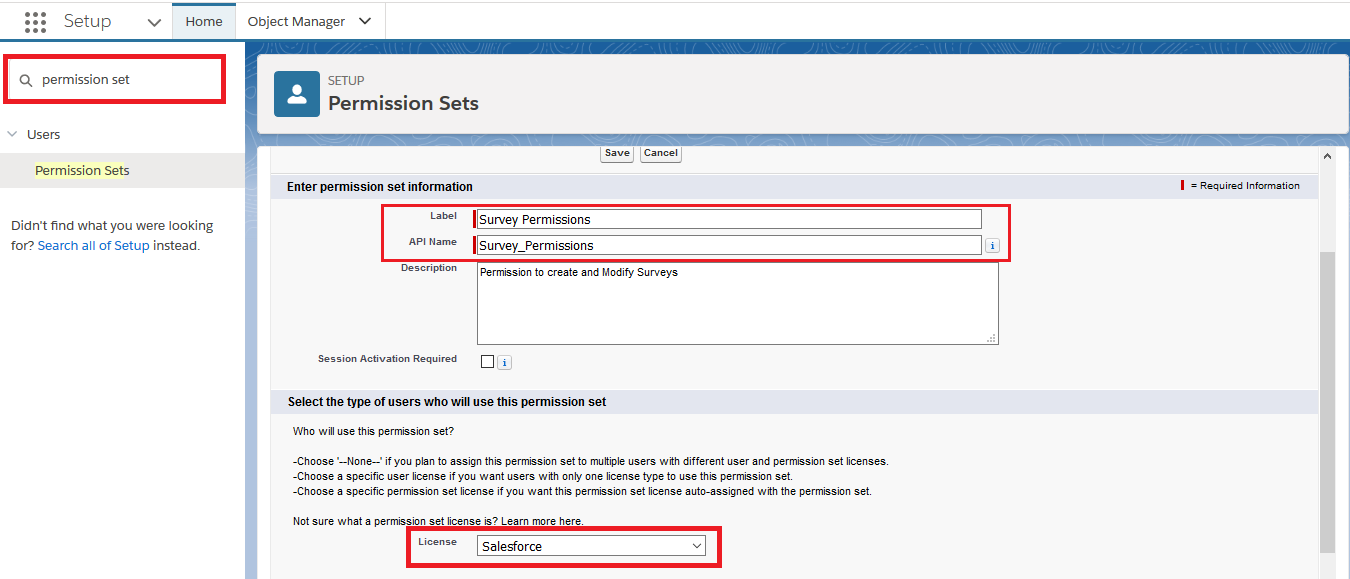
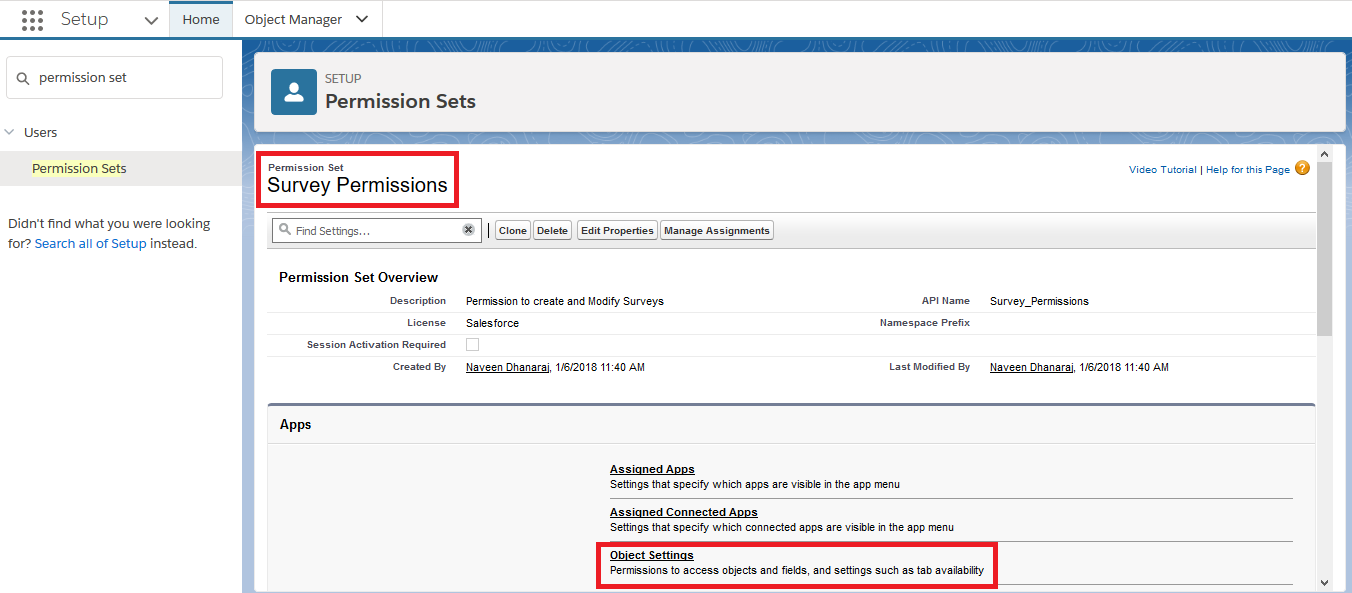
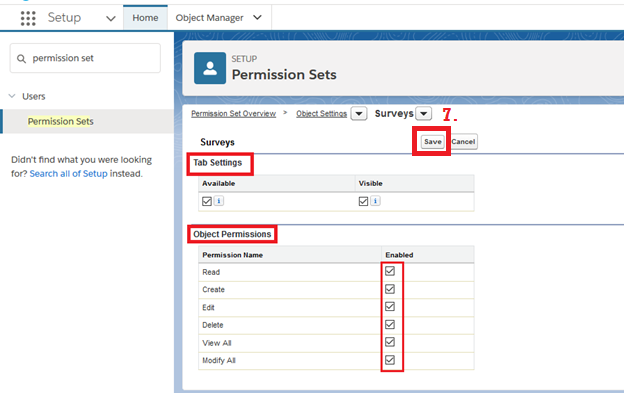
3. In Permission Set, go to Object Settings.
4. Click on the Surveys link under the Object Settings section.
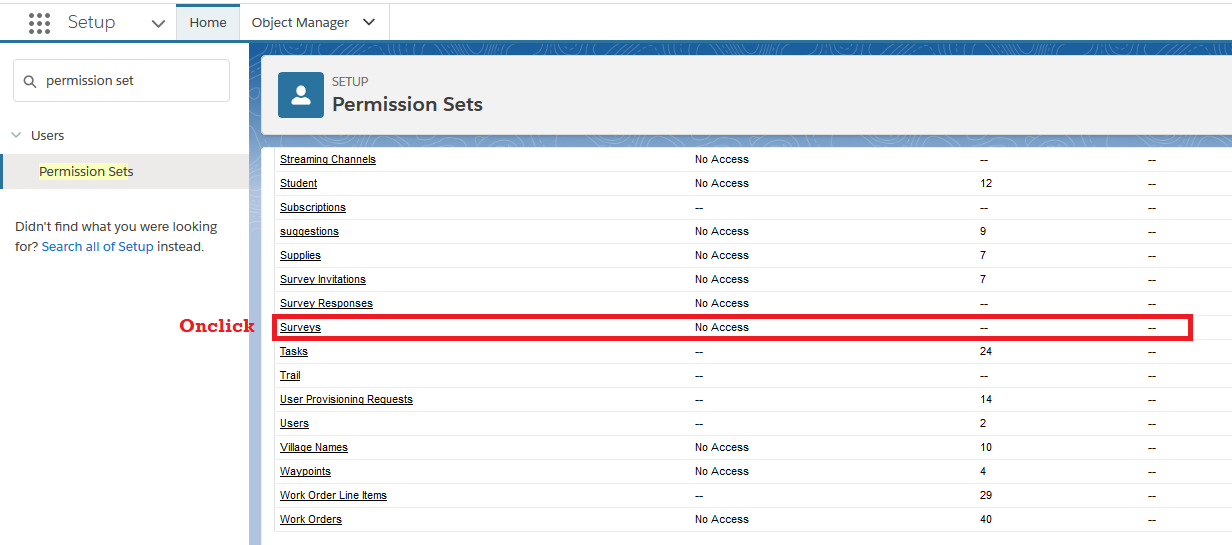
5. Edit Permission Set.
6. Enable necessary permissions for a user in Permission Set.
7. Click Save.
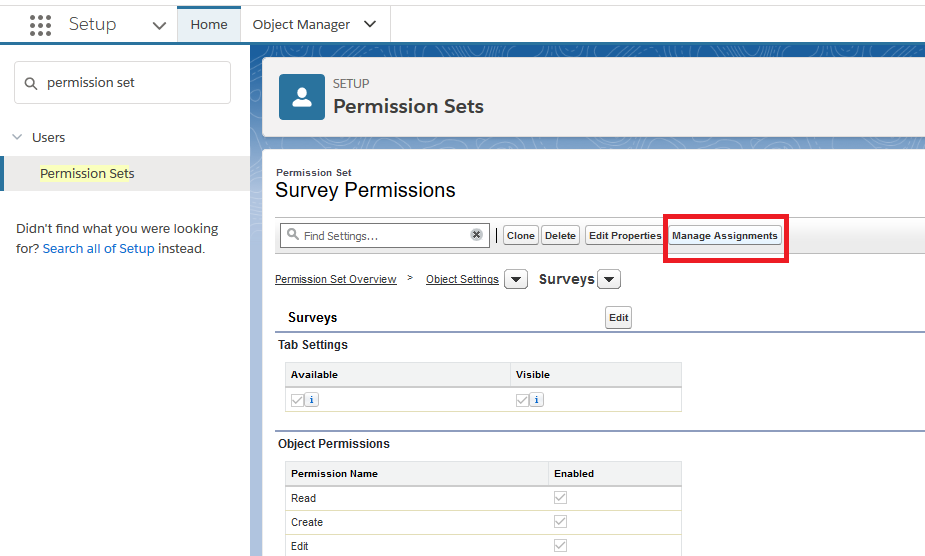
8. Click Manage Assignments.
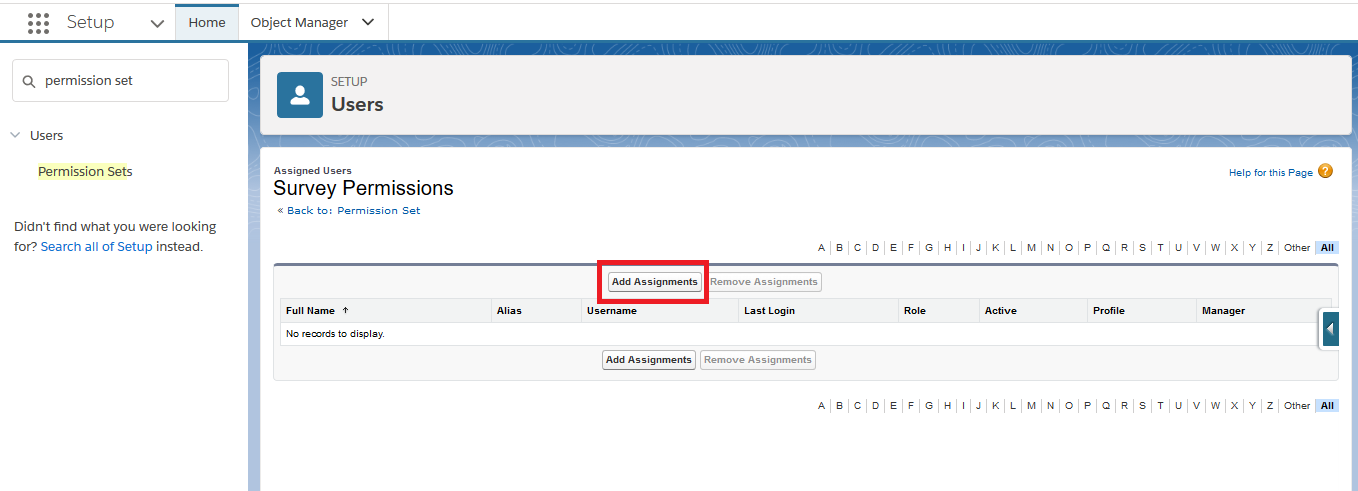
9. Click Add Assignments.
10. Assign Permission Set to the desired Users.
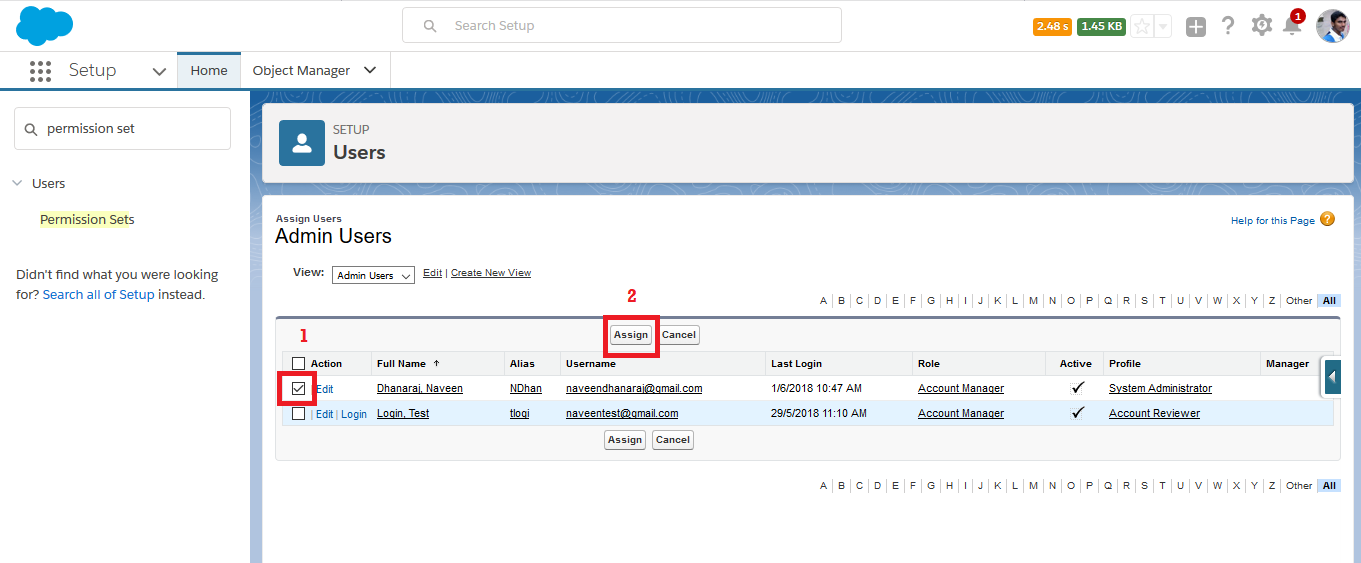
11. The below screenshot depicts that the Permission Set has been assigned to a User.

12. Navigate to the App Launcher to create a Survey.
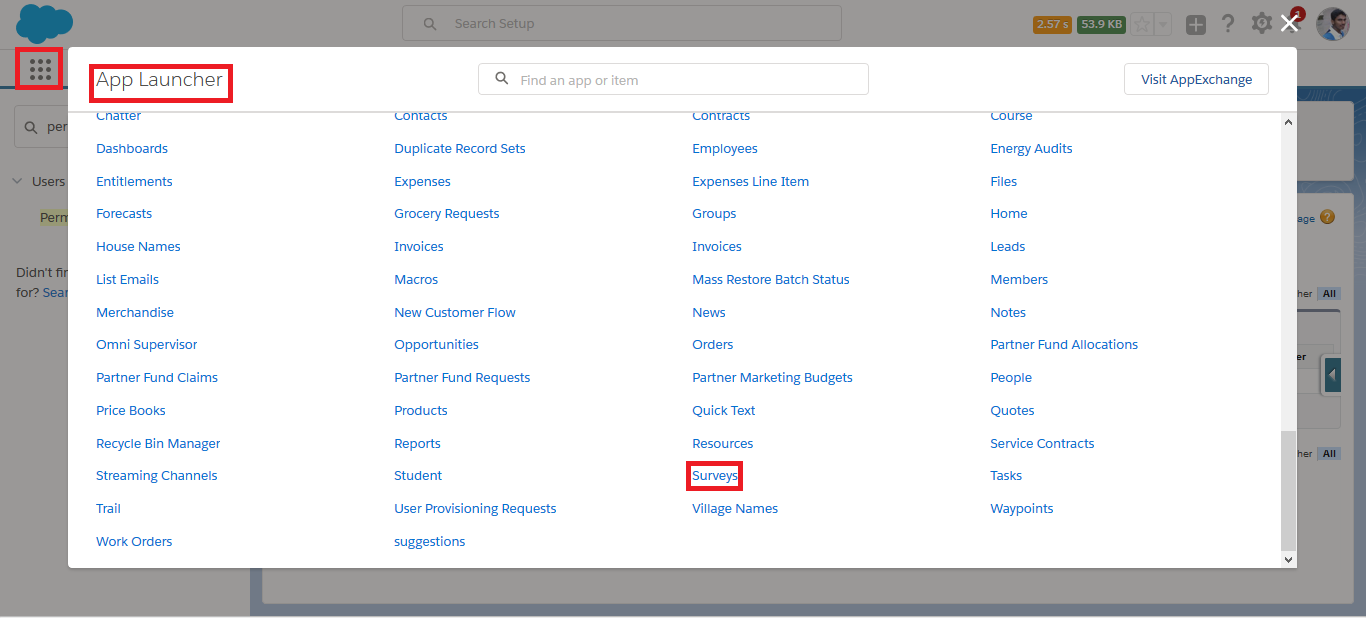
13. Click New to create a Survey.
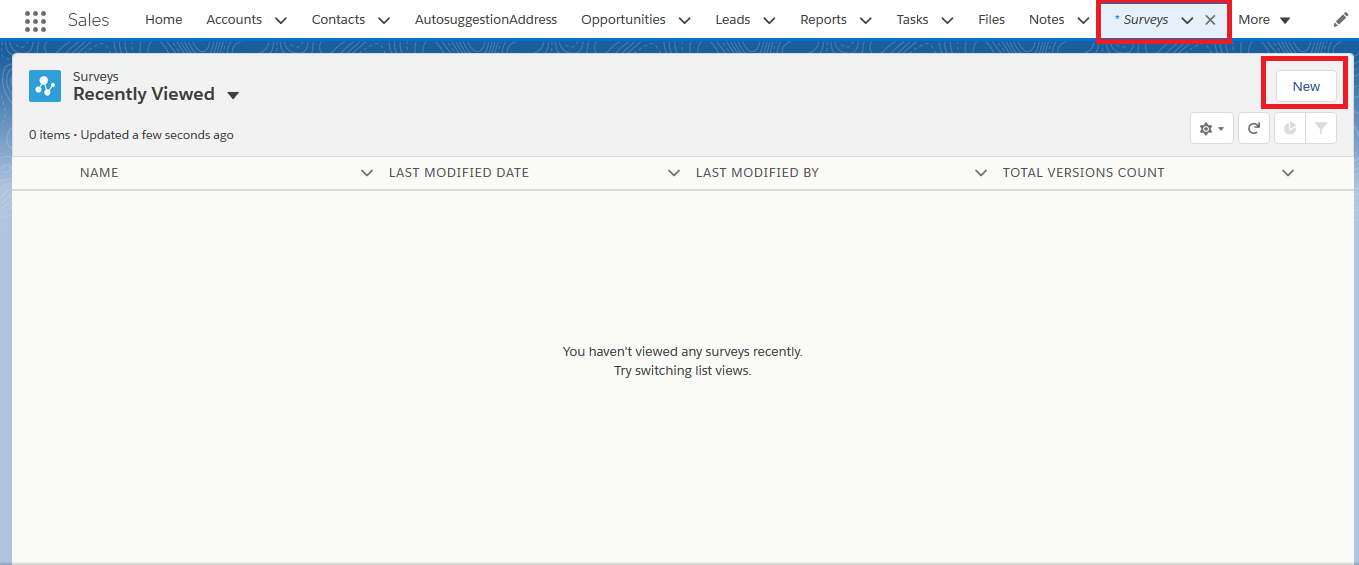
14. Build the Survey.
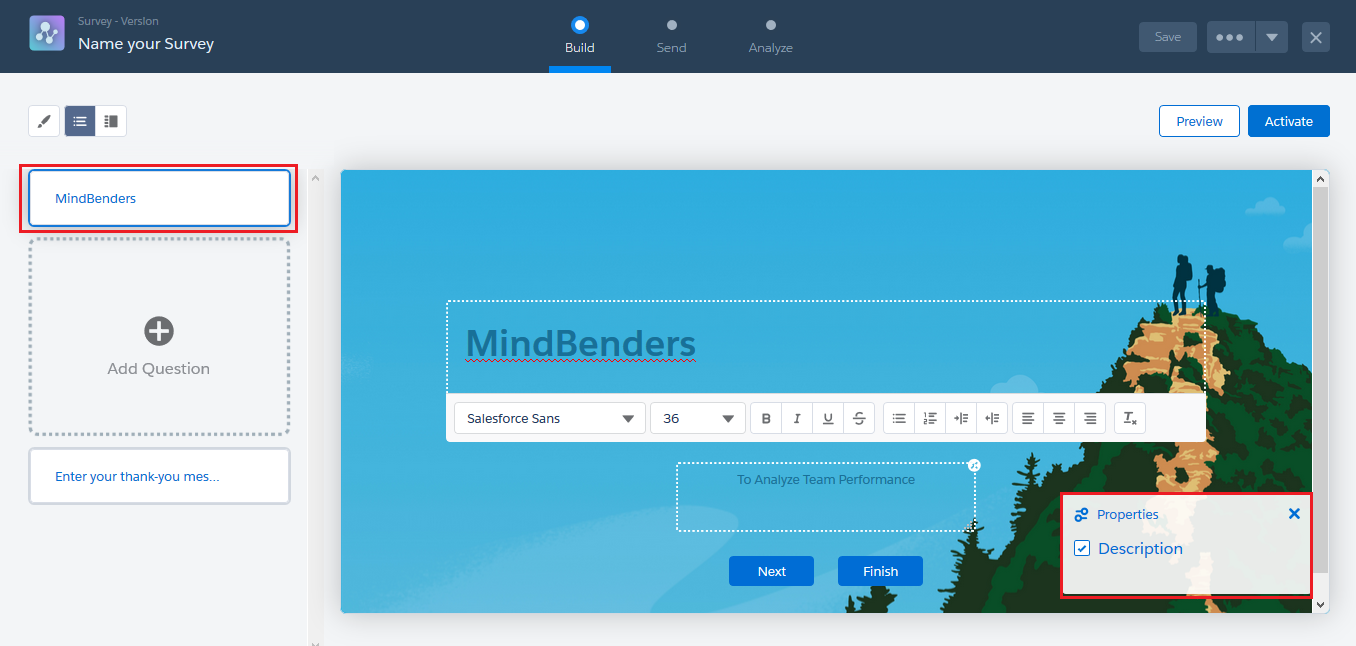
15. Modify Text Color, Background Image and Button color like as shown below:
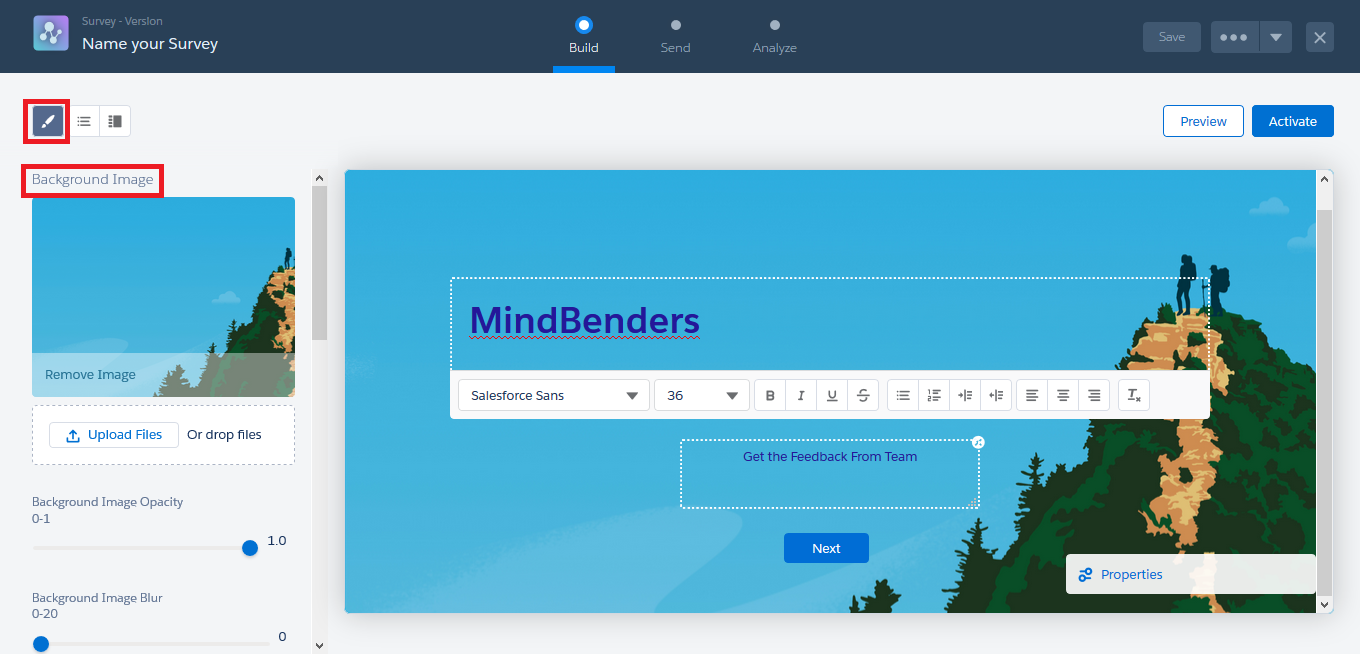
16. Add Question with different types of options like Radio, Rating, Multiple choice, Text etc.
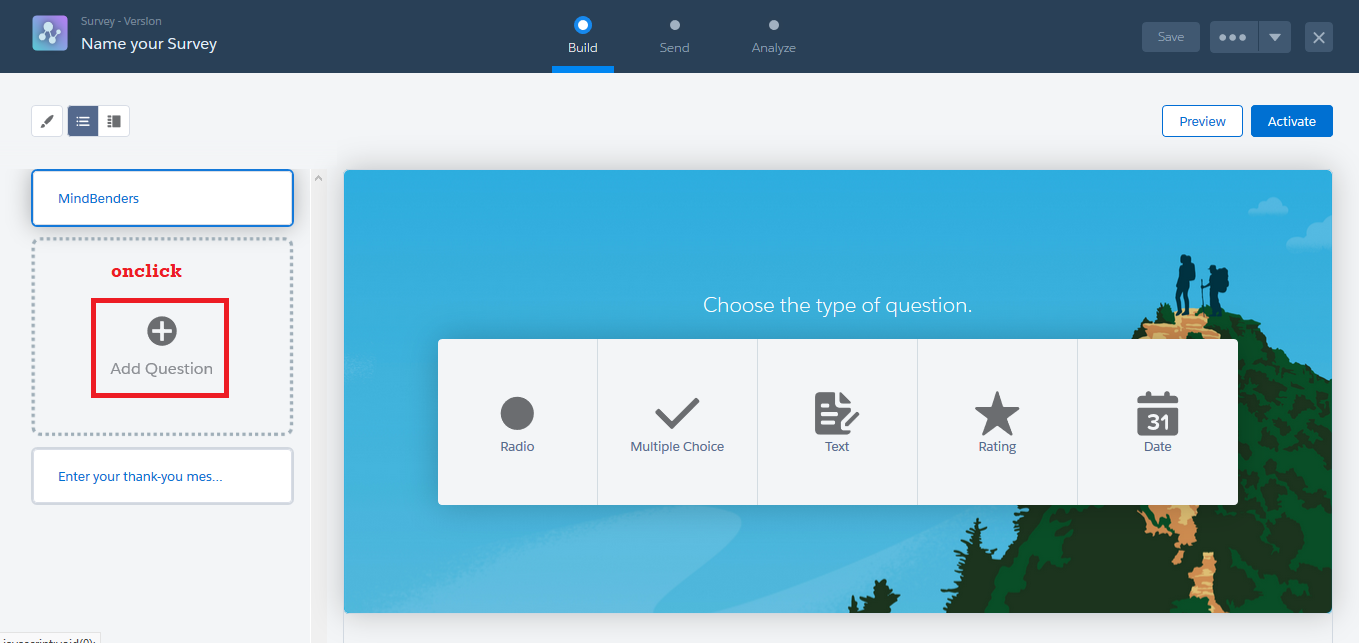
17. Rating:
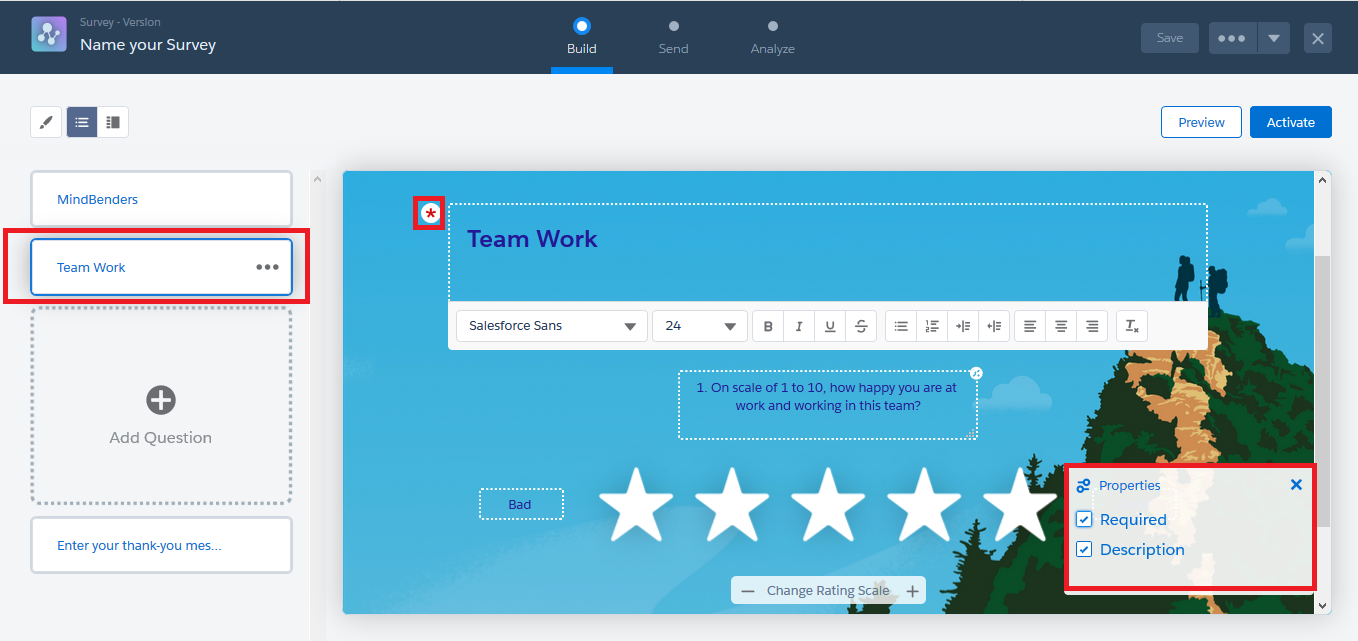
18. Text: In Text, you can enter characters up to a limit of 250 characters.
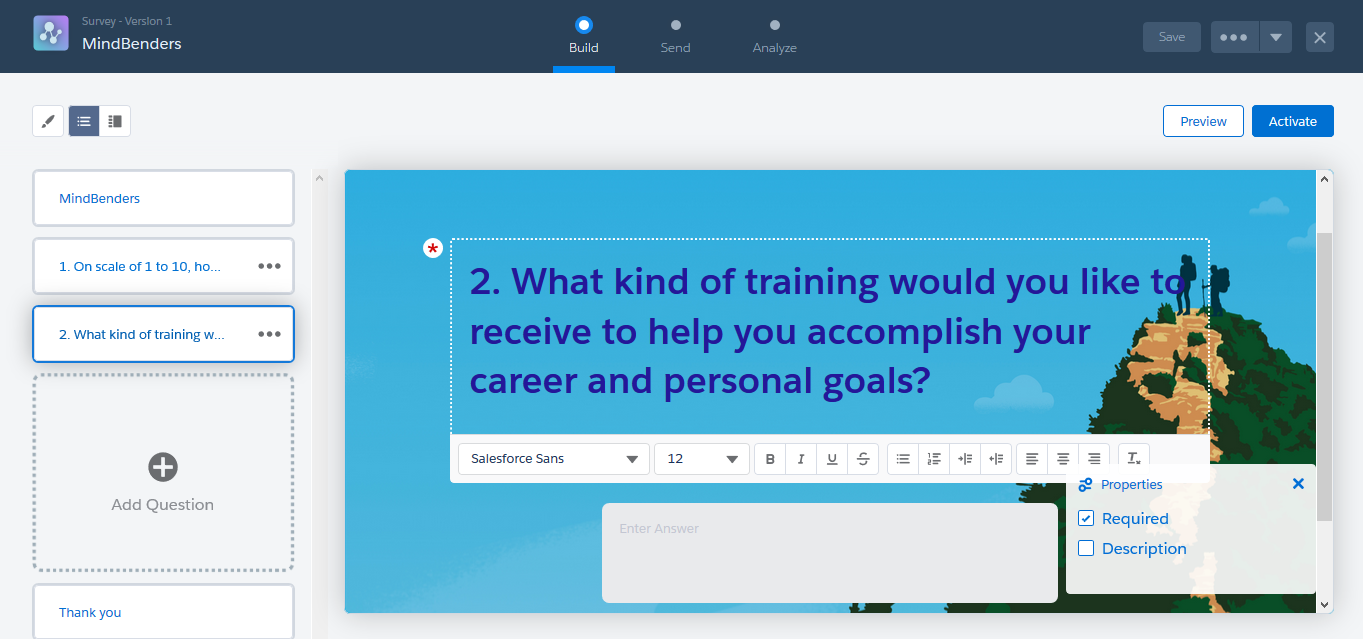
19. Radio: In Radio type, only one answer can be selected.
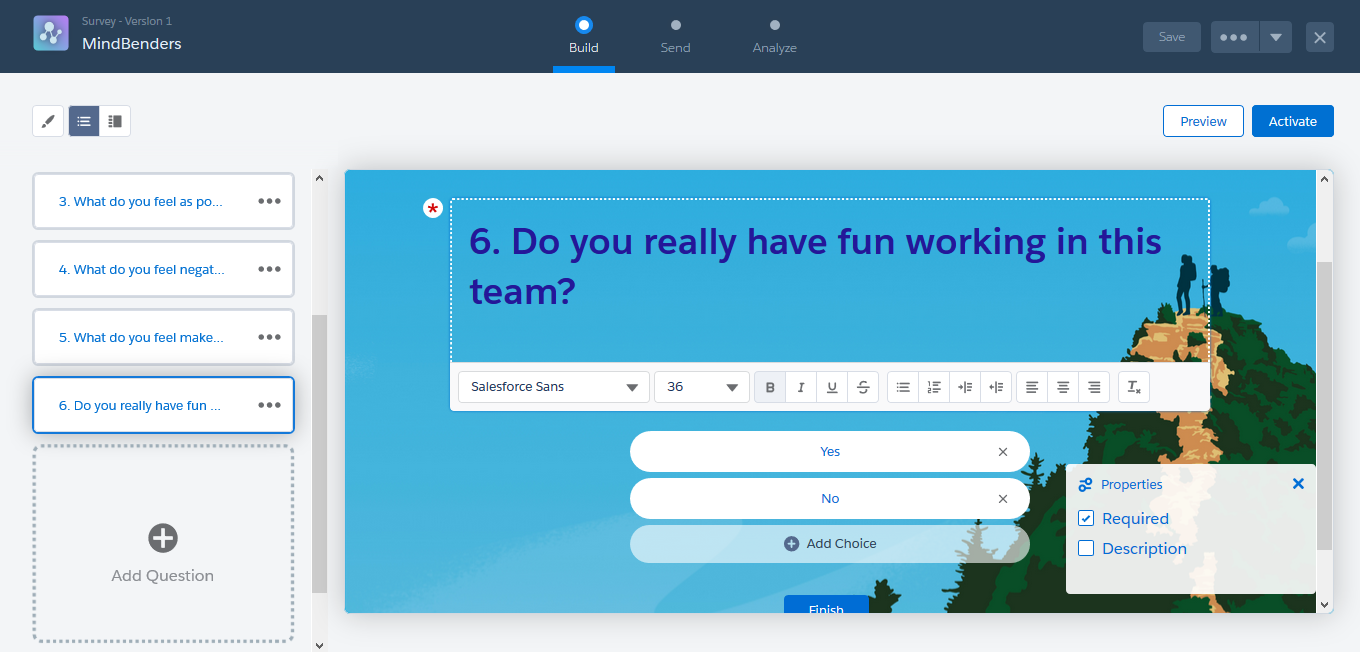
20. In Multiple: You can select Multi picklist Values.
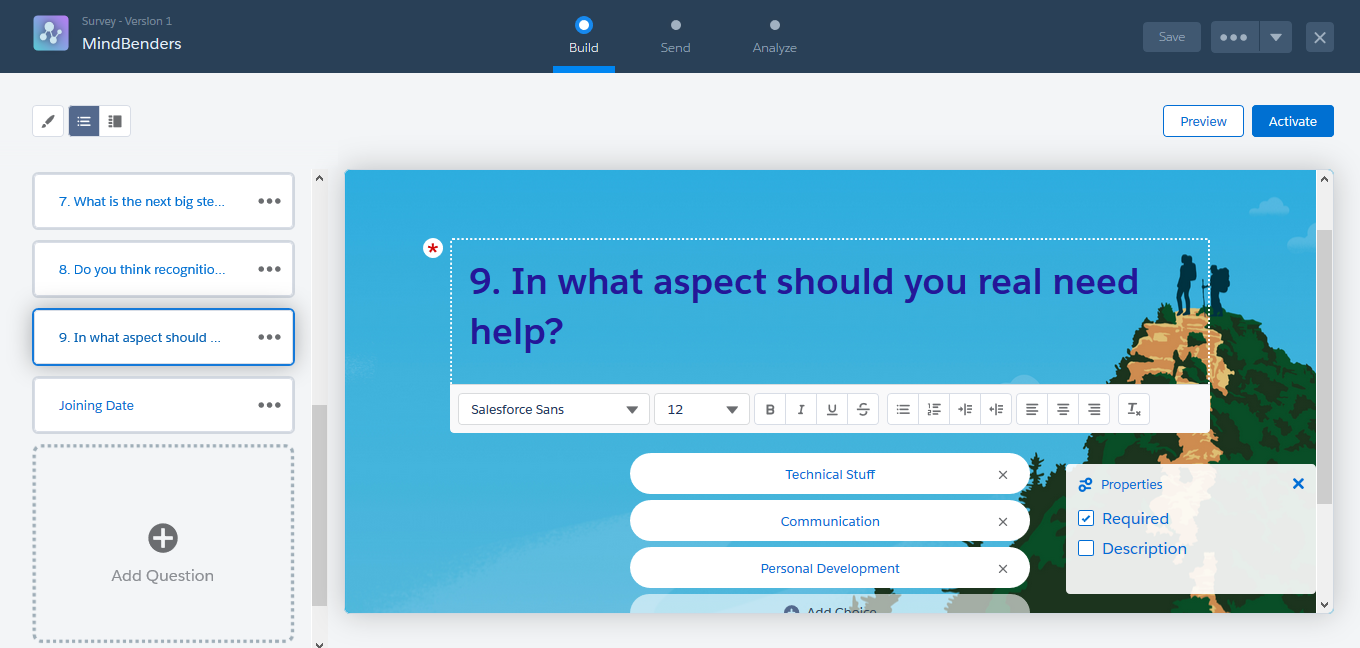
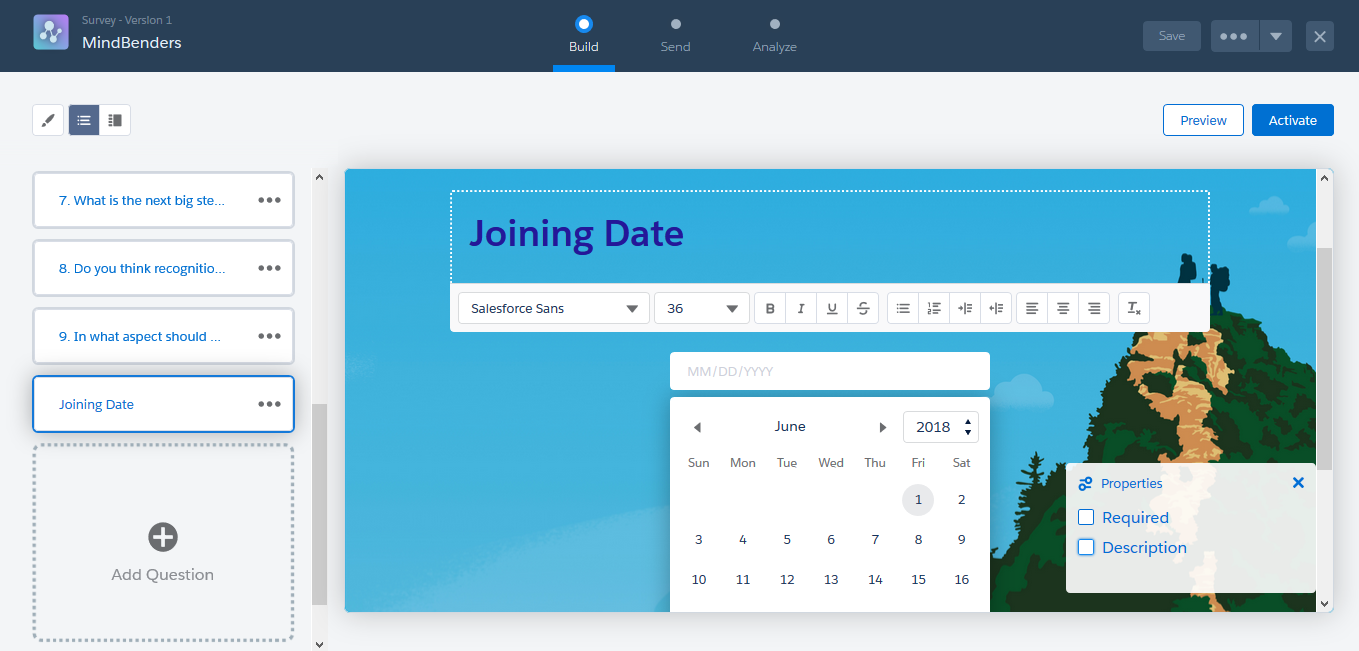
21. Date: You can choose a Date from the Calendar.
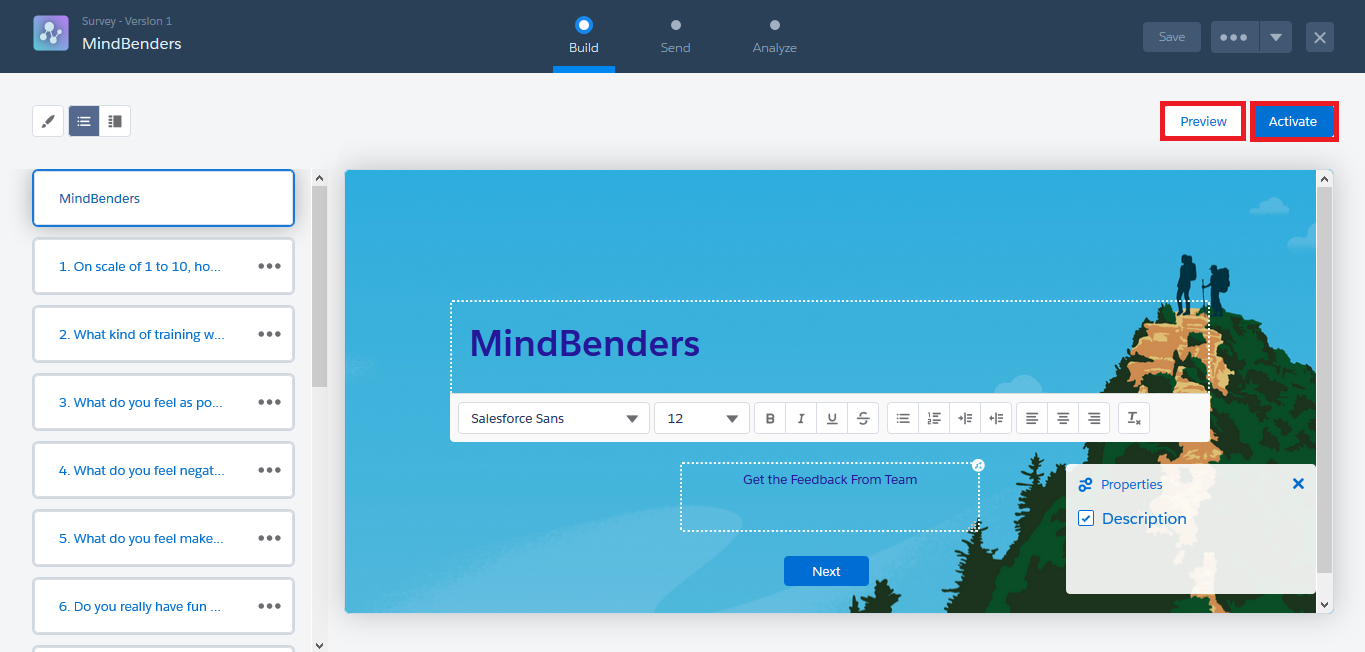
22. Activate or Preview before activating.
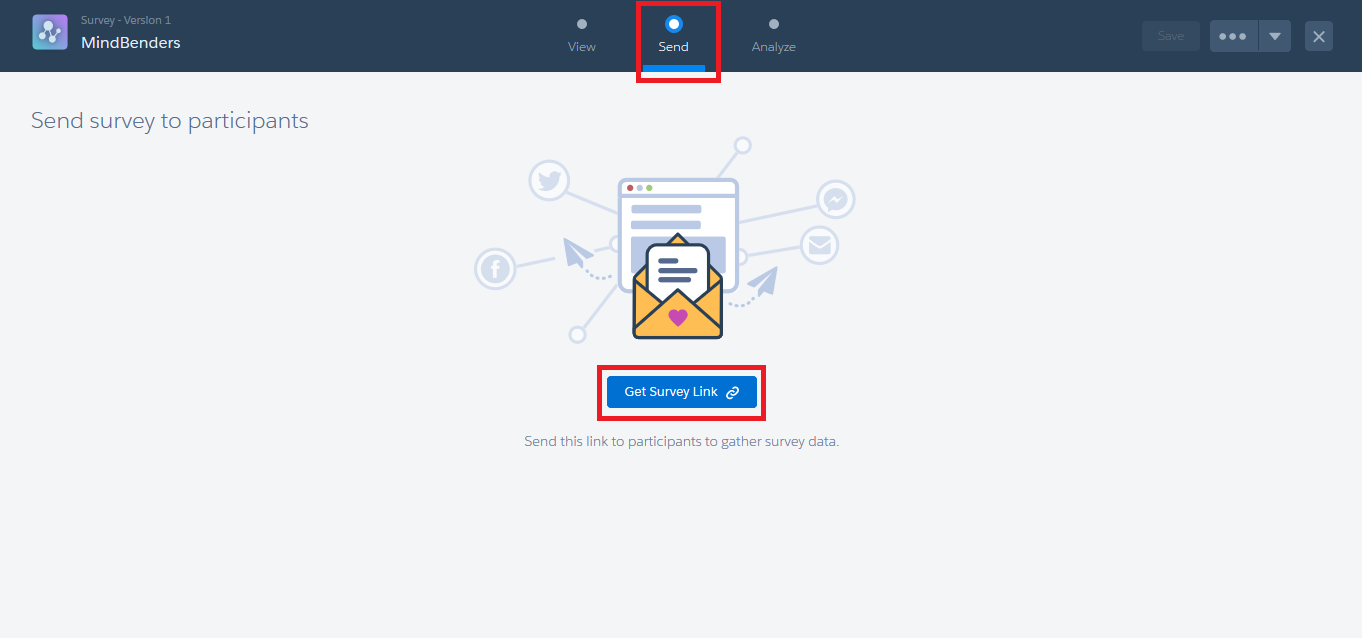
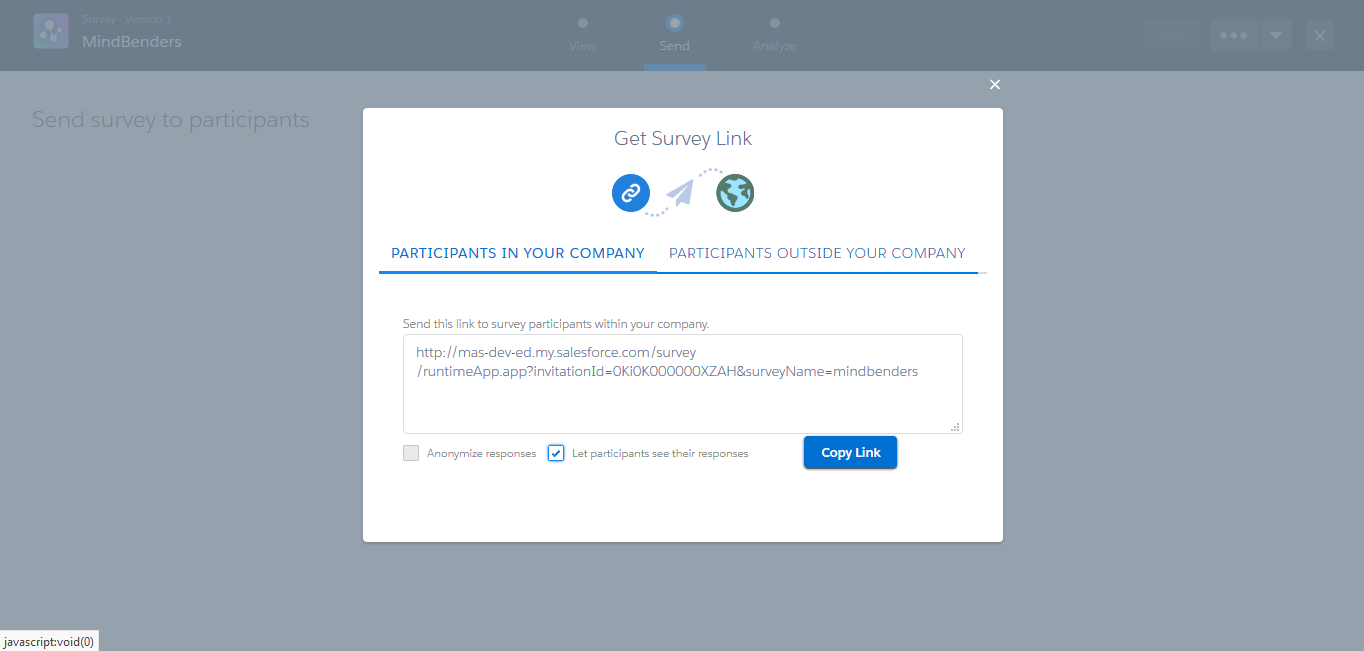
23. Get Survey Link to share with participants to gather survey data.
24. Survey Link for Internal users in the company.
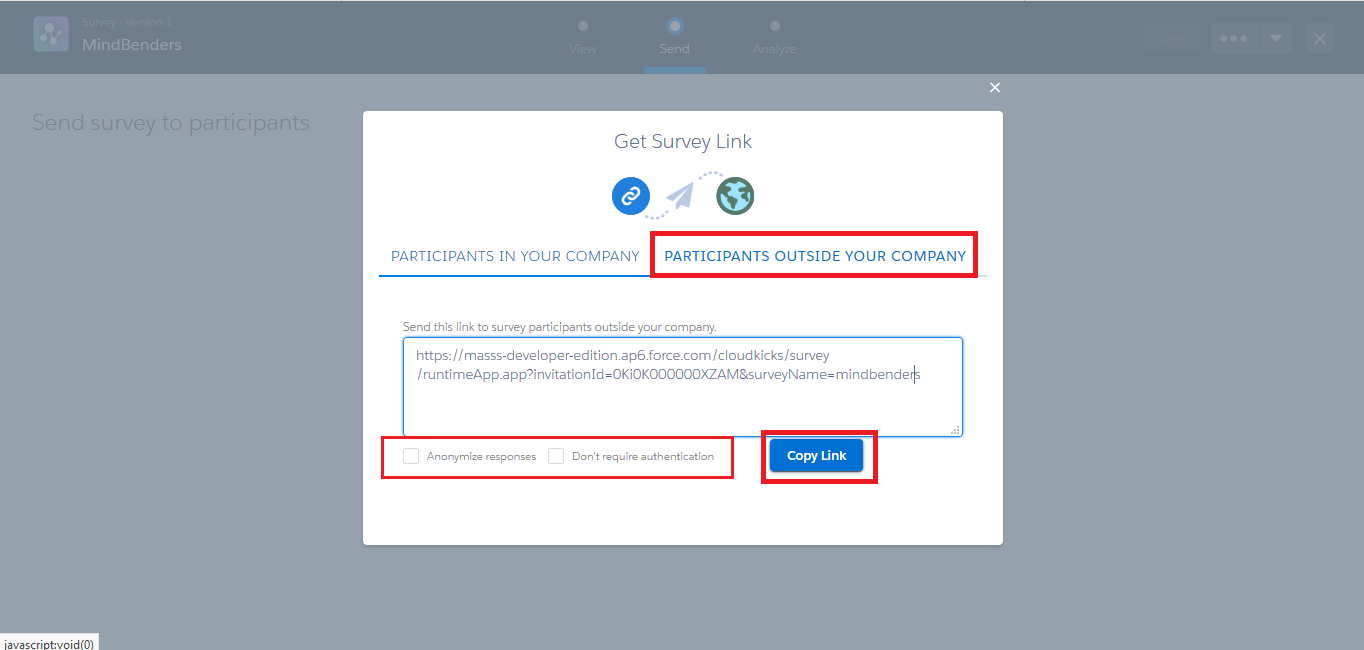
25. Survey Link for External Users in the company and you can choose whether authentication is required or not.
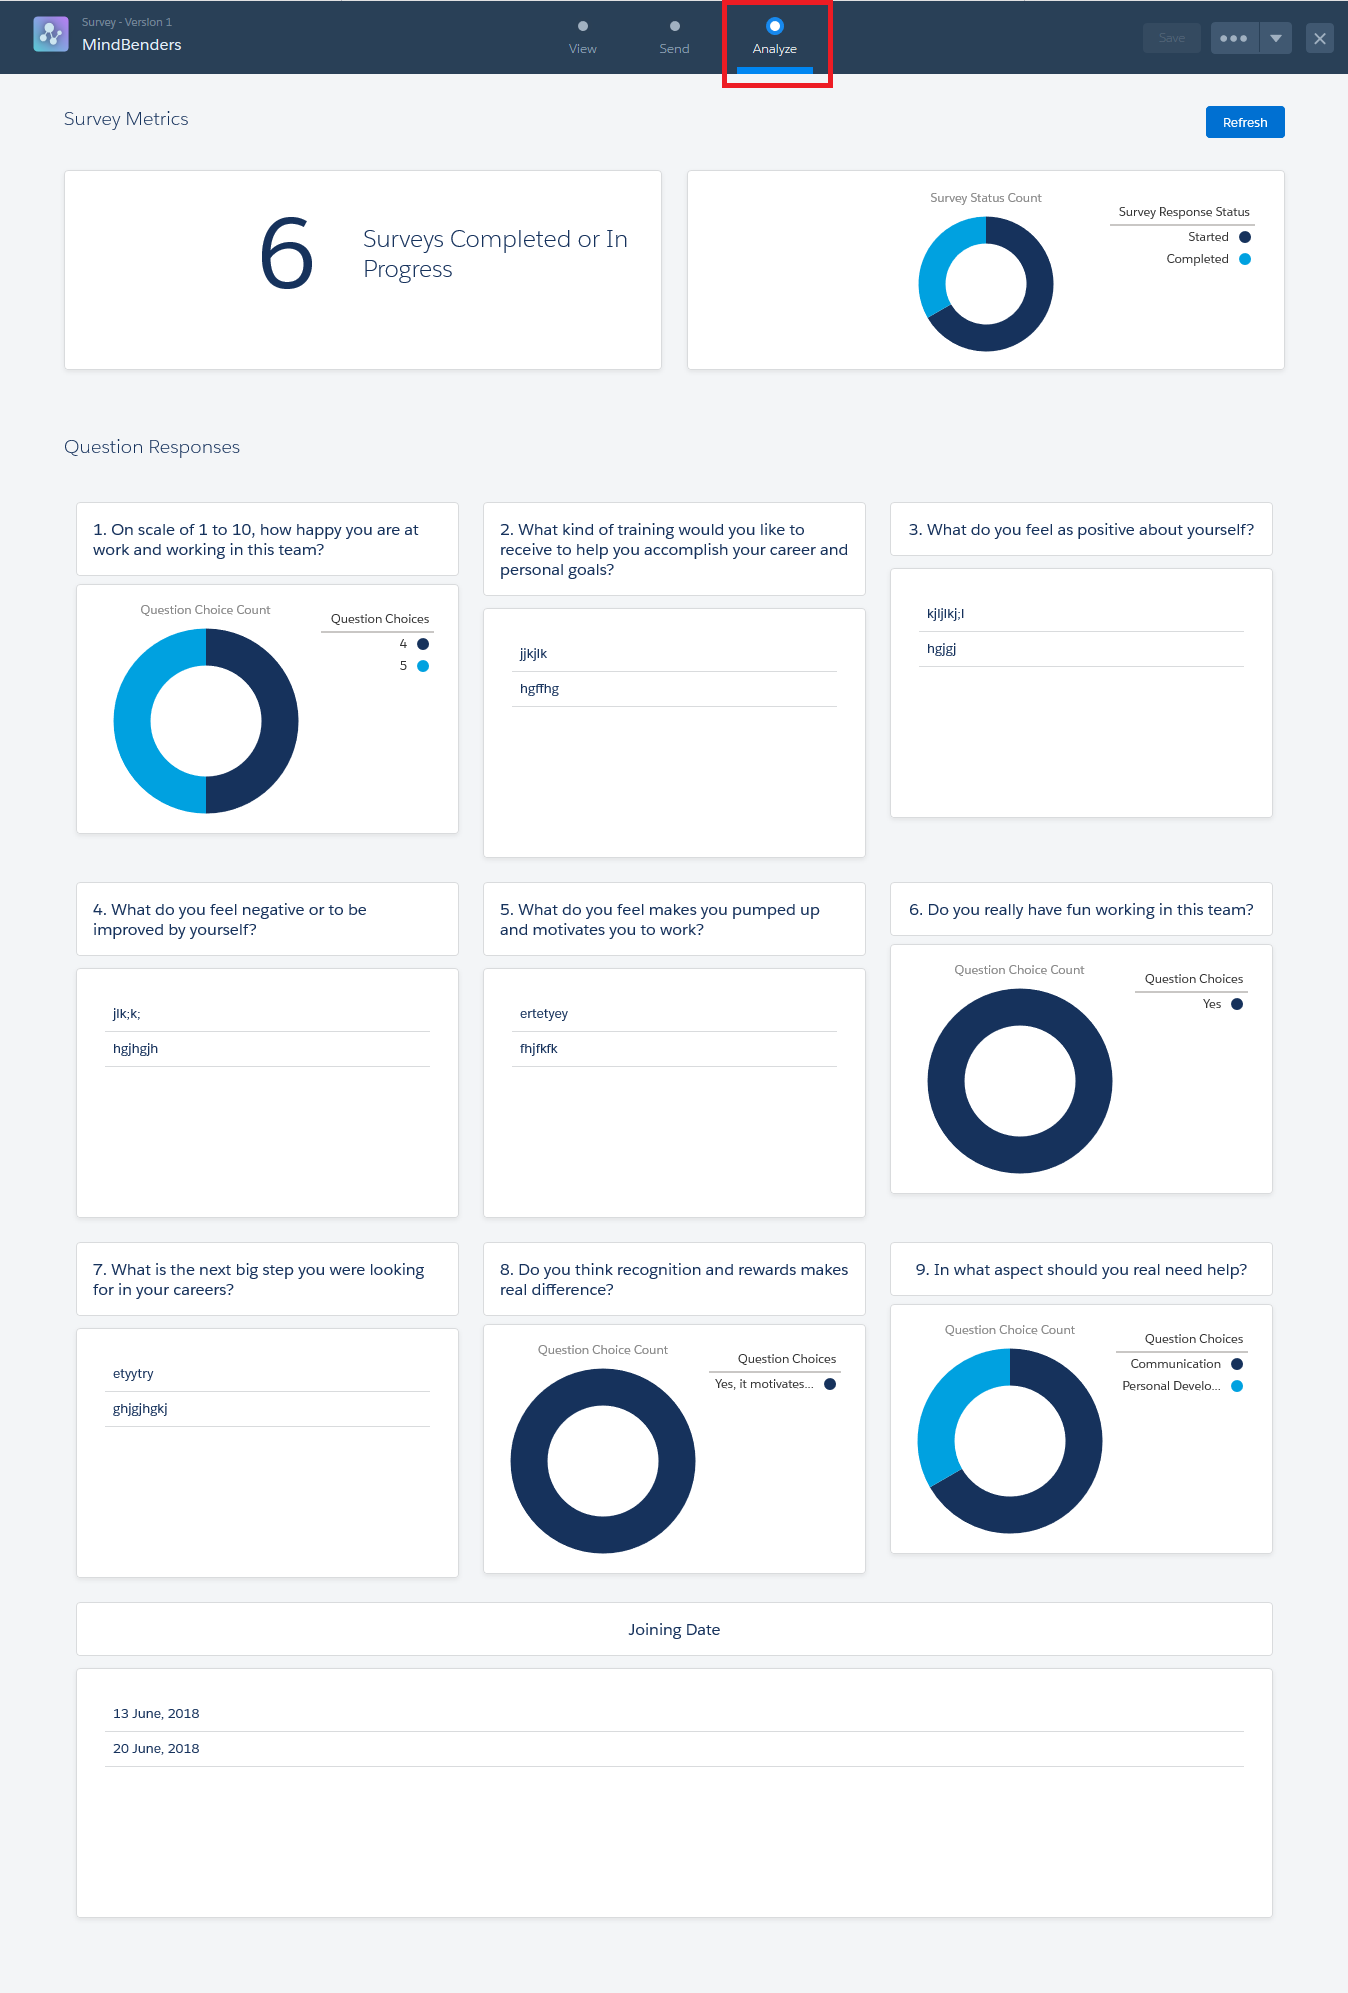
26. You can view the survey response in Analyze Tab,
- You can find the Dashboards of Survey Responses submitted.
- You can find the Survey Response answers in Analyze Tab.
Create Reports for surveys:
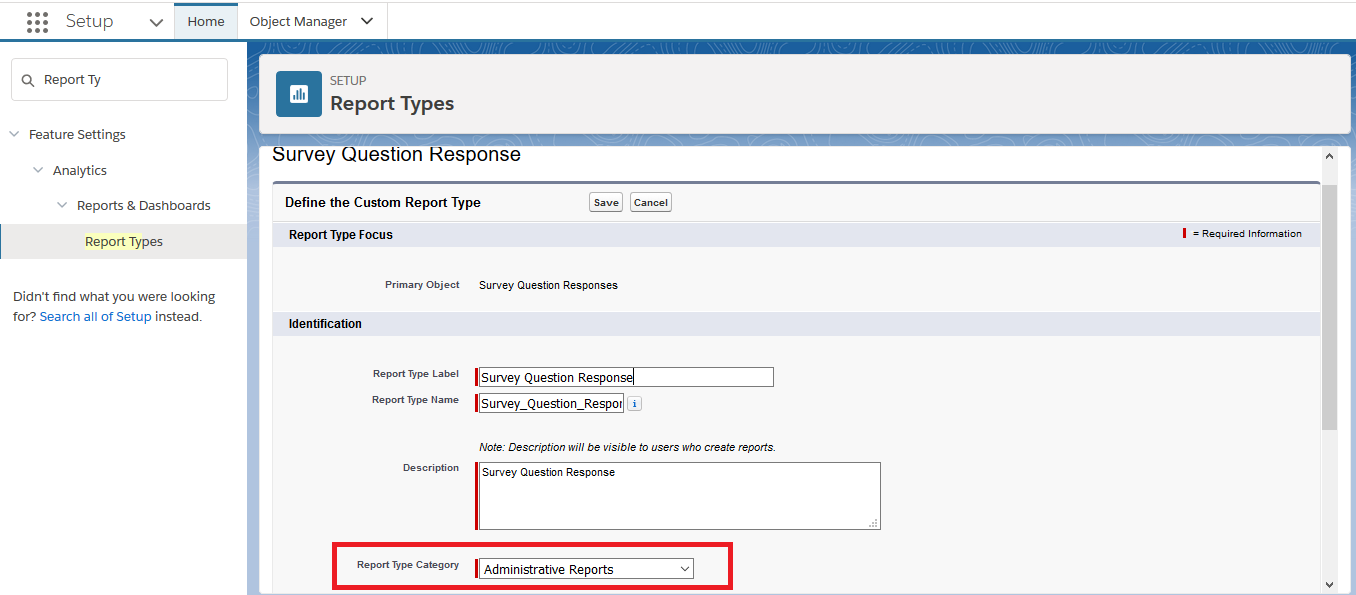
1. Create New custom Report Type. Setup >> Quickfind >> Report Types >> Click New Custom Report Type.

2. Choose Primary Object for custom Report Type. For Example, I have chosen Survey Responses and also made sure Report Type Deployment Status is Deployed.
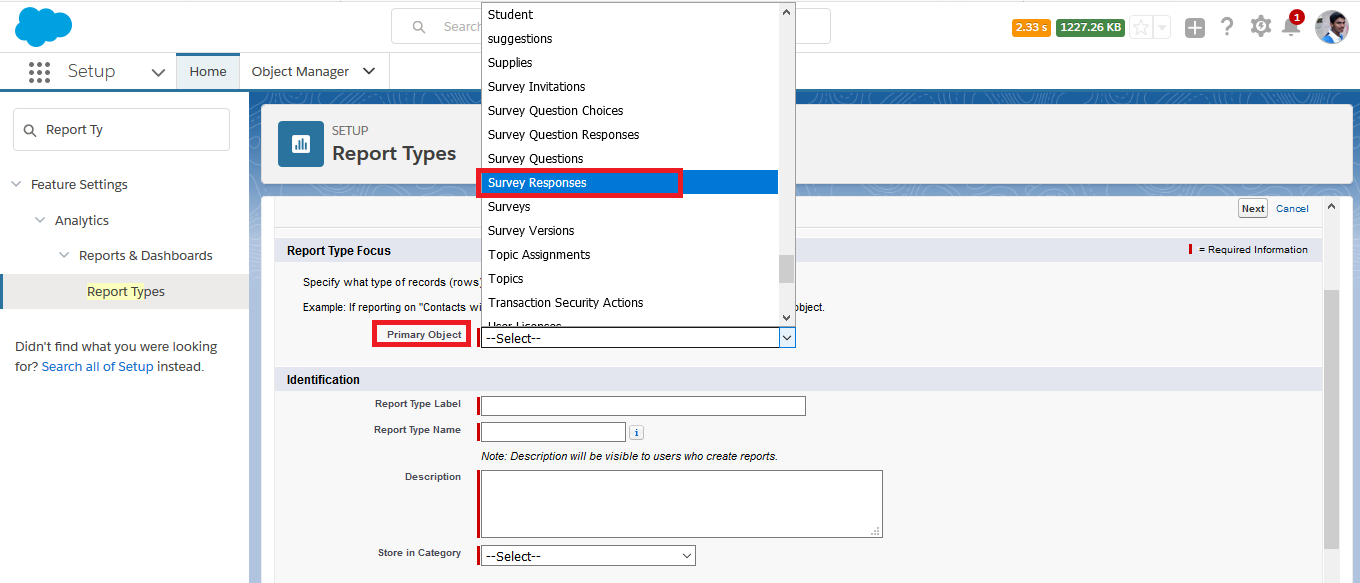
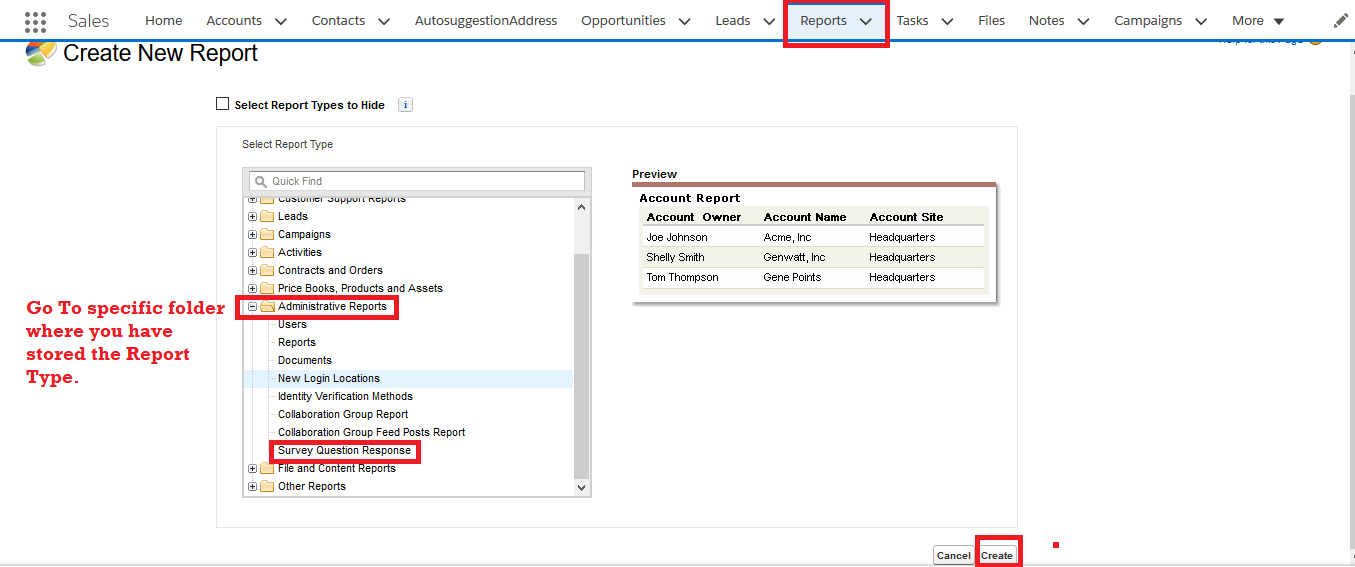
3. Store the created Report Type in specific Folder using Report Type Category.
4. Create Report.
5. Survey Response Report.
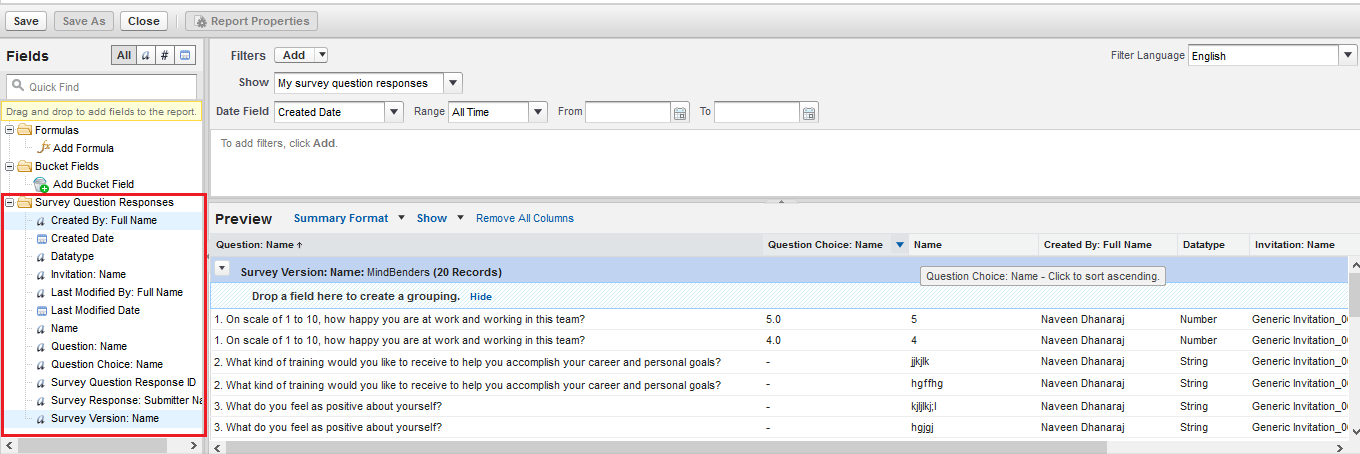
You can create a Report for below primary objects.
- Surveys.
- Survey Invitations.
- Survey Question.
- Survey Question Choices.
- Survey Question Response.
- Survey Response.
- Survey Versions.
There are slight differences between all objects. You can create a Report and easily figure out the differences.
