Rest Apex Integration
minutes read
Integration refers to a process that aims to stitch together different, often disparate, subsystems so that the data contained in each becomes part of a larger, more comprehensive system.This system can ideally, quickly and easily share data when needed.
Data integration uses SOAP APIs and REST APIs. It typically handles data synchronization requirements, where one application in an enterprise acts as the primary source for a particular business object, like Account.
Apex Web Services allows us to write logic and expose it as a web service with external applications.
- It is a service available over the web.
- It provides a standard protocol/format for communication.
- Using web services, two different applications can talk to each other and exchange data/information.
- Data can be serialized in either XML or JSON format.
Now let’s dive into Rest Web Service.
REST (REpresentational State Transfer) is an architectural style.
HTTP Methods :
POST ——————> Create
GET ——————> Read
PUT ——————> Upsert
DELETE ——————> Delete &
PATCH ——————> Update
Here is the simple web service & Rest Callout to integrate Salesforce to Salesforce Organisations without Authentication.This can help you understand how integration works.
- Among two Salesforce orgs, one would be the Source Org and the other is Target Org.
- The Source org is where we write the Web Service. Thus API provides a way to expose the data you have within your Force.com application to external applications.
- The Target org is where we write a callout to consume the service provided by the source org.
Step 1:Login to Salesforce org → GoTo → Set up → Apex class
- The web service uses HTTPGet method to retrieve the account records.
- @RestResource is a keyword for web service, the url mapping is used in Endpoint URI.
- It returns the Account records as per the SOQL query.
| @RestResource(urlMapping = ‘/displayAccounts’) global class AccountRestService { @HttpGet global static List < Account > doget() { List < Account > result = [Select Id, name, phone, Website from account limit 100]; System.debug(‘Result:::’ + result); return result; } } |
Step 2 : Create site url “https://testrestservice-developer-edition.ap4.force.com”
Step 3: In Site Detail, go to Public Access Settings and give permissions to the object involved in service and web service class.
Public Access Endpoint URL:
To the site URL append ‘ /services/apexrest/displayAccounts’ to get data.
https://testrestservice-developer-edition.ap4.force.com/services/apexrest/displayAccounts
Now our web service is ready to get the records.
Callout :
In target org, create a callout to consume the response.
Step 1:
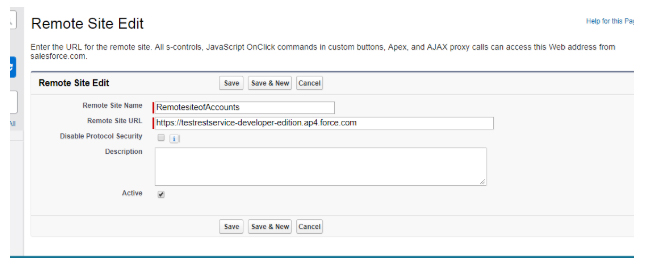
Go to → Set up → Remote site settings → Create new remote site and add site url
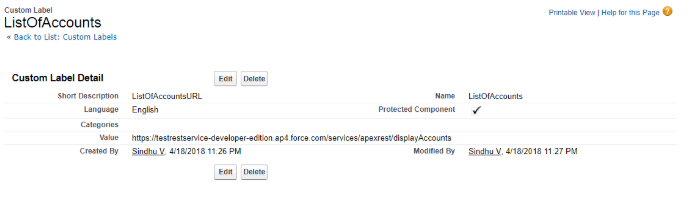
Step 2: Go to → Custom Labels in quick find box → New Custom label → Add the public site url.
Step 3:Create an Apex class:
| public class displayAccountCallout { public displayAccountCallout() { set <String> AccountIdset = new set <String> (); for (Account ac: [select id, Name, Phone, Website, ExId__c from Account where ExId__c != null limit 5000]) { AccountIdset.add(ac.ExId__c); } // Declaration of Http Request class HTTPRequest req = new HTTPRequest(); req.setEndpoint(Label.ListOfAccounts); req.setMethod(‘GET’); // Declaration of Http Response class HTTP http = new HTTP(); HTTPResponse res = http.send(req); String strResponse = res.getBody(); //Deserializing the response List<Account> lstAccounts = ( List<Account>) JSON.deserialize( strResponse , List<Account>.class ); accWrpList = new List < wrapAccounts > (); for (integer i = 0; i < lstAccounts.size(); i++) { accwrap = new wrapAccounts(); accwrap.Id = lstAccounts[i].id; accwrap.Name = lstAccounts[i].Name; accwrap.Phone = lstAccounts[i].Phone; accwrap.Website = lstAccounts[i].Website; accwrap.isChecked = false; if (!AccountIdset.contains(accwrap.Id)) { accWrpList.add(accwrap); } system.debug(‘LIST—–‘ + accWrpList); } } public pageReference doSave() { List < Account > acList = new List < Account > (); for (wrapAccounts wa: accWrpList) { if (wa.isChecked == true) { Account a = new Account(); a.Name = wa.Name; a.Phone = wa.Phone; a.ExId__c = wa.Id; acList.add(a); } system.debug(‘%%%%%’ + acList.size()); } if (acList.size() > 0) { try { insert acList; } catch (Exception e) { system.debug(‘ERROR :’ + e); } } return (new pagereference(‘/apex/HttpVf’).setRedirect(true)); } public wrapAccounts accwrap {get; set;} public List<wrapAccounts> accWrpList {get; set;} public class wrapAccounts { public string Id {get; set;} public string Name {get; set;} public string Phone {get; set;} public string Website {get; set;} public Boolean isChecked {get; set;} } } |
Have a look on JSON class and its static methods, refer this link.
Visualforce page :
| <apex:page controller=“displayAccountCallout” tabStyle=“Account” > <apex:form > <apex:pageBlock title=“Add Accounts” > <apex:pageBlockTable value=“{!accWrpList}” var=“ac”> <apex:column headervalue=“select”> <apex:inputCheckBox value=“{!ac.isChecked }”/> </apex:column> <apex:column headervalue=“Account Id” value=“{!ac.Id}”/> <apex:column headervalue=“Account Name” value=“{!ac.Name}”/> <apex:column headervalue=“Account Phone” value=“{!ac.Phone}”/> <apex:column headerValue=“Account Website” value=“{!ac.Website}”/> </apex:pageBlockTable> <apex:pageBlockButtons > <apex:commandButton value=“Save” action=“{!doSave}”/> </apex:pageBlockButtons> </apex:pageBlock> </apex:form> </apex:page> |
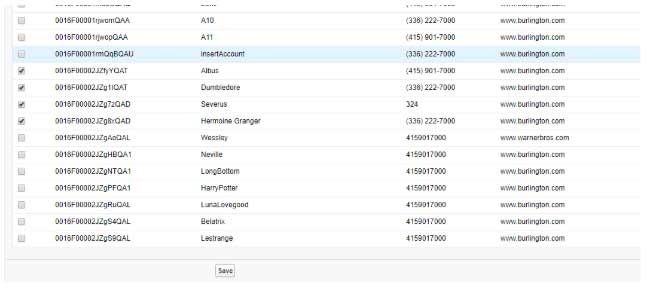
Description of functionality:
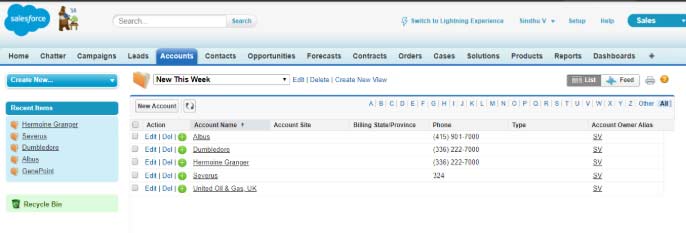
It is to fetch the records from end point and display the records in Visualforce page. Then, the required records can be saved to target organisation by selecting them.
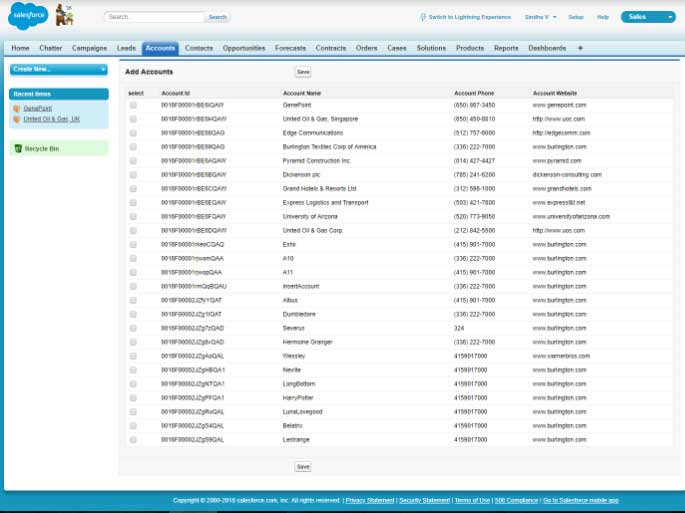
The selected records can be saved to database.
Similarly we can perform other Http methods like Post, Put, Delete, Patch.
Now, let’s get into Rest Integration (WITH AUTHENTICATION).
Salesforce uses the OAuth protocol to allow users of applications to securely access data without having to reveal username and password credentials. We cannot expose data as shown above (making public site).
Before making REST API calls, you must authenticate the application user using OAuth 2.0. To do so, you’ll need to:
Set up your application as a connected app in the Salesforce organization.
Step 1: Create a connected app in source org
Create Apps → Connected Apps → New → Check Enable OAuth Settings → Give callback URL → Selected Oauth Scopes and save it.
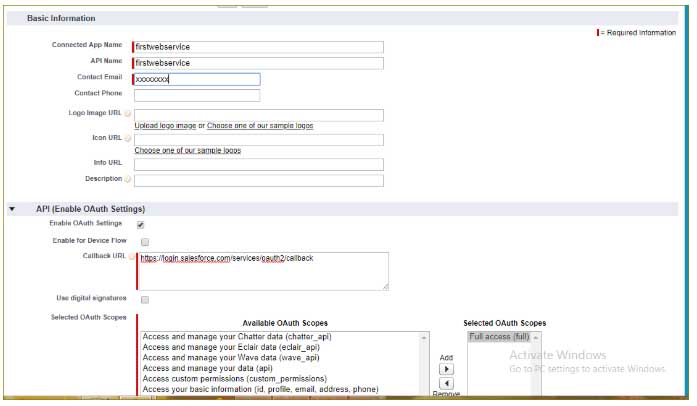
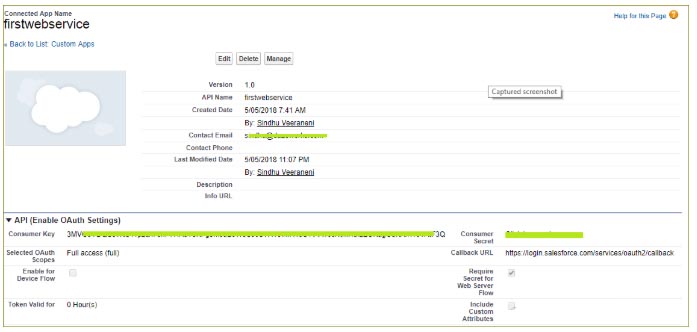
Consumer Key, Consumer Secret will be generated.
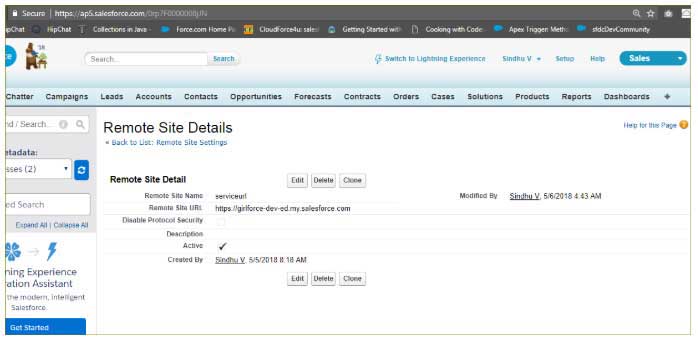
Step 2: In Target Org Create New Remote Site, which is the instance of Source org.
In my case it’s ‘https://girlforce-dev-ed.my.salesforce.com’
OAuth endpoints are the URLs you use to make OAuth authentication requests to Salesforce.
- For authorization: https://login.salesforce.com/services/oauth2/authorize
- For token requests: https://login.salesforce.com/services/oauth2/token
If you’re verifying authentication on a sandbox organization, use “test.salesforce.com” instead of “login.salesforce.com” in all the OAuth endpoints listed above.
Step 3: Create an apex class
In the class we provide the Consumer Key(clientId), Consumer Secret(clientsecret) from connected app, UserName and Password+security token of source org.
| public class SendAccount { String clientId = label.ClientId; String clientsecret = label.Clientsecret; String username = label.Username; String password = label.Password_SecurityToken; String accesstoken_url = ‘https://login.salesforce.com/services/oauth2/token’; String authurl = ‘https://login.salesforce.com/services/oauth2/authorize’; public class deserializeResponse { public String access_token; } public String ReturnAccessToken() { String reqbody = ‘grant_type=password&client_id=’ + clientId + ‘&client_secret=’ + clientSecret + ‘&username=’ + username + ‘&password=’ + password; Http h = new Http(); HttpRequest req1 = new HttpRequest(); req1.setBody(reqbody); req1.setMethod(‘POST’); req1.setEndpoint(‘https://girlforce-dev-ed.my.salesforce.com/services/oauth2/token’); HttpResponse res = h.send(req1); System.debug(res.getBody() + ‘**********’); deserializeResponse der = (deserializeResponse) JSON.deserialize(res.getBody(), deserializeResponse.class); return der.access_token; } } |
Visualforce page and functionality remain the same as (in Integration without authentication).
Have a question or comment for us? Drop a line below or send us a message here.