Managing Your Bookmarks with Salesforce APIs
minutes read
Anyone who has worked on the Salesforce platform would be familiar with the term APIs. This blog tries to demystify the working of Salesforce APIs through a real-life example. Most of us, at some point or the other, would have felt the need to access our favorite websites without worrying about using the same device all the time. We would have been limited to using the same desktop or laptop and the same browser for all our activities in order to access our bookmarks. How do I overcome this seemingly simple challenge? The bookmarks are very lengthy and cannot be shared easily through email, web pages or social media services like Twitter and Facebook. So that option is ruled out. What else?
To get through this dilemma, I need to consider two factors:
- The URL should be transferable and flexible.
- It should be shortened to make things easier.
I realized that Salesforce can give a simple solution to my problem. Using Salesforce, I can store all the bookmarks in Custom Object in my personal Org. At any given time, I can access the Object with my Salesforce credentials (the magic of cloud, if you will!) Going a step further, I can create a Force.com site and make it public, saving me a lot of trouble in accessing my bookmarks. I tried this and it worked like a charm!
The step-by-step process below shows you how it can be done.
Step 1: Creating a Bookmarks App
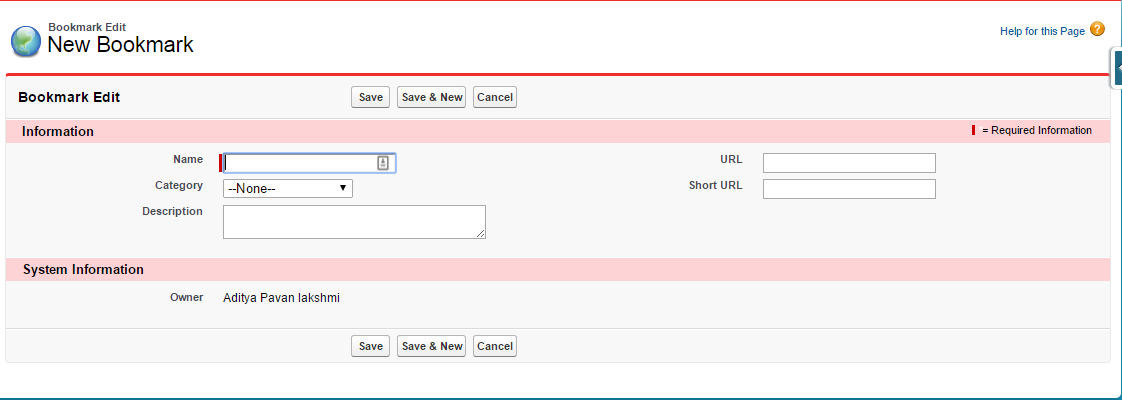
a) Create an App named ‘My Bookmark’ in your Salesforce Org. Next, create a custom object with name Bookmark and with API name Bookmark__c. The Bookmark layout will look like this.
b) In this custom object, create 4 custom fields as given below to store your bookmarks on the cloud.
- Description -> API name: Description__c, Data type -> Text Area (255)
- Category -> API name: Category__c, Data type -> Picklist
- Number of votes field -> API name: Number_of_votes__c, Data type -> Number Roll-up-summary (COUNT Vote)
- Short URL -> API name: Short_URL__C, Data type -> URL
The custom fields in the bookmark will look like this.

c) Next, we need to define the picklist fields for Category__c field. Here’s what I did.

d) Create custom object called Vote__c which was associated with the Bookmark__c object. This gives internal users within my org the option to vote up any bookmark that I record.
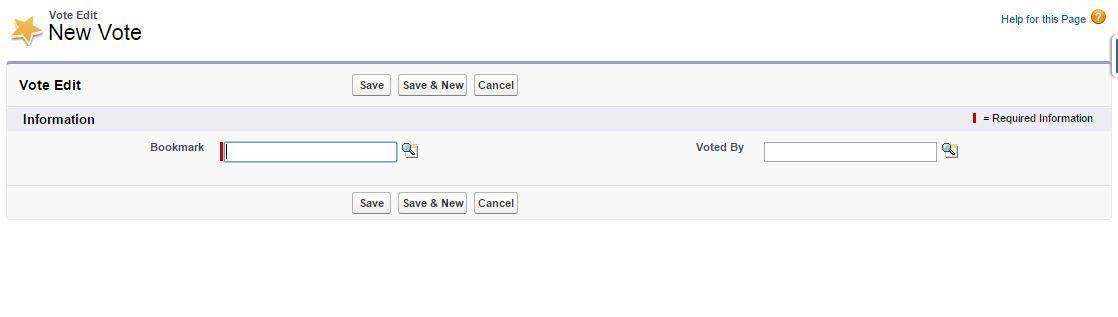 e) The fields in the Vote__c Object are:
- Bookmark -> API name: Bookmark__c, Data type -> Master-Detail
- Voted By -> API name: Voted_By_C, Data type -> Lookup

f) Now we are all set to store data in the Salesforce Org.
Step 2: Shortening the URLs
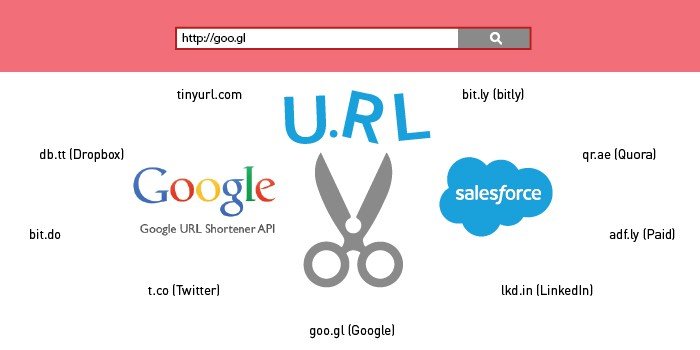
Next step is to shorten the URLs got from the Bookmarks object. Upon doing some background research on sites providing URL shorteners, I found that most of them such as bit.do, t.co (Twitter), lkd.in (LinkedIn), db.tt (Dropbox), qr.ae (Quora), adf.ly (Paid), goo.gl (Google), bit.ly (bit ly), tinyurl.com and YouTube APIs need OAuth (open Authentication). A bit of further digging showed that Google APIs do not have an OAuth requirement.
Here I have used Google URL shortener for the links to be saved in the bookmark object.
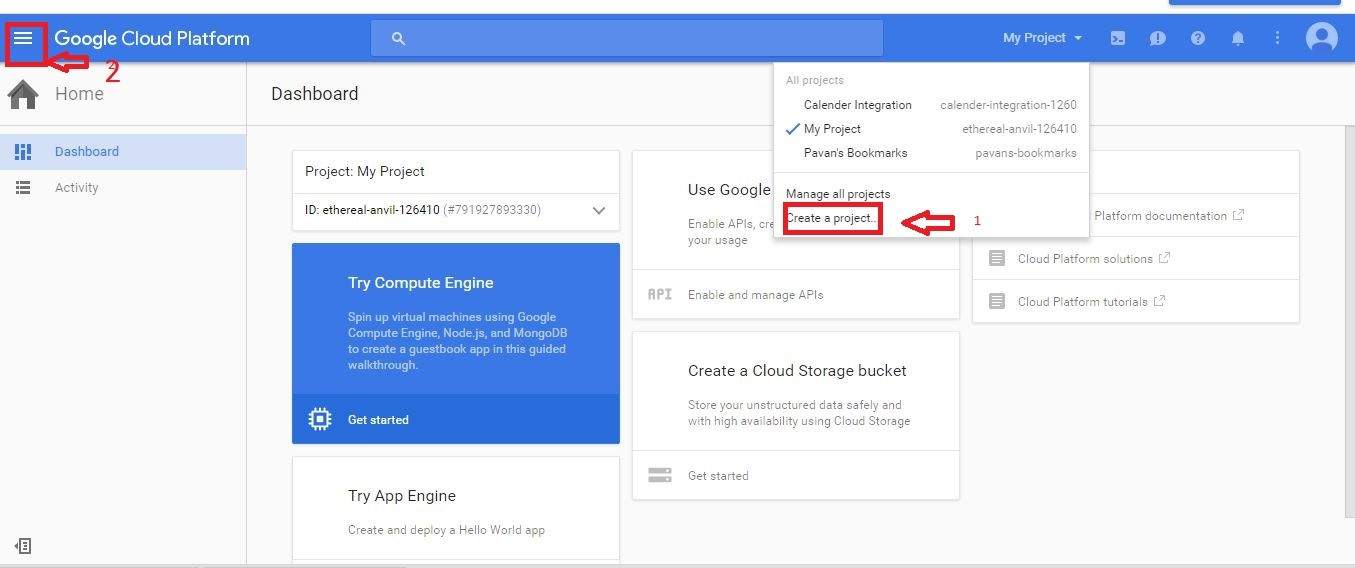
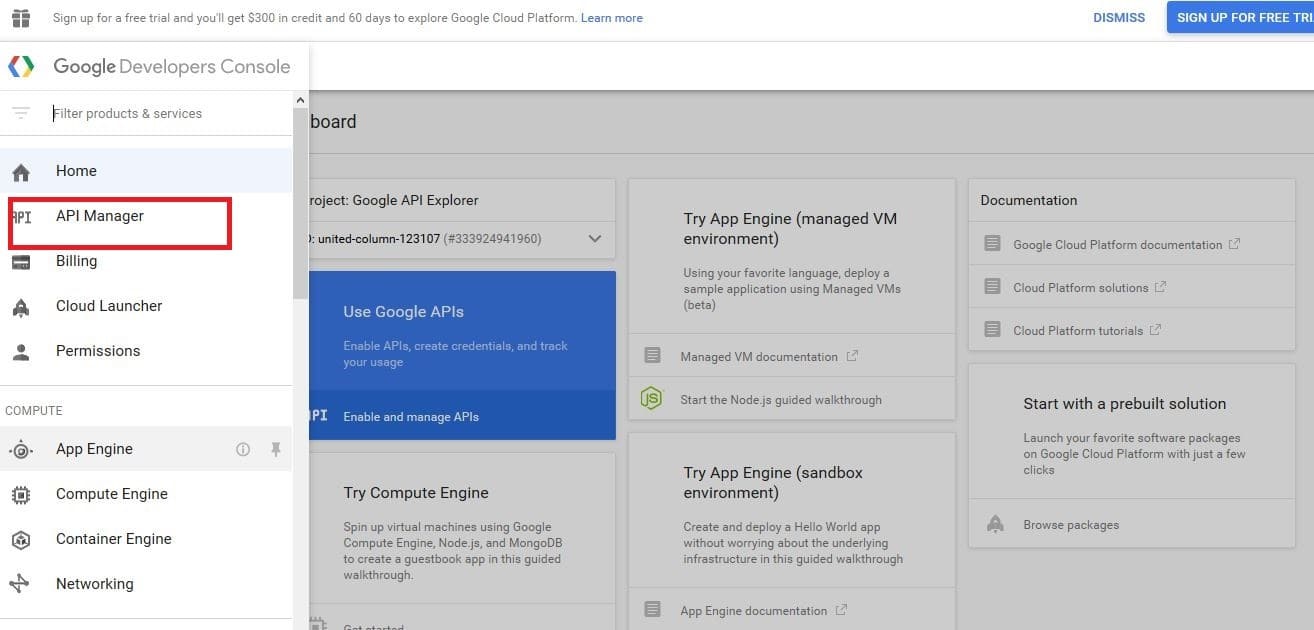
a) Go to Google Cloud Platform and click the console on the top right corner. Click Select a project or Create a new project (1 in screenshot below). Then, click the navigator in the left corner (2 in screenshot below).
b) Click API Manager in the menu.
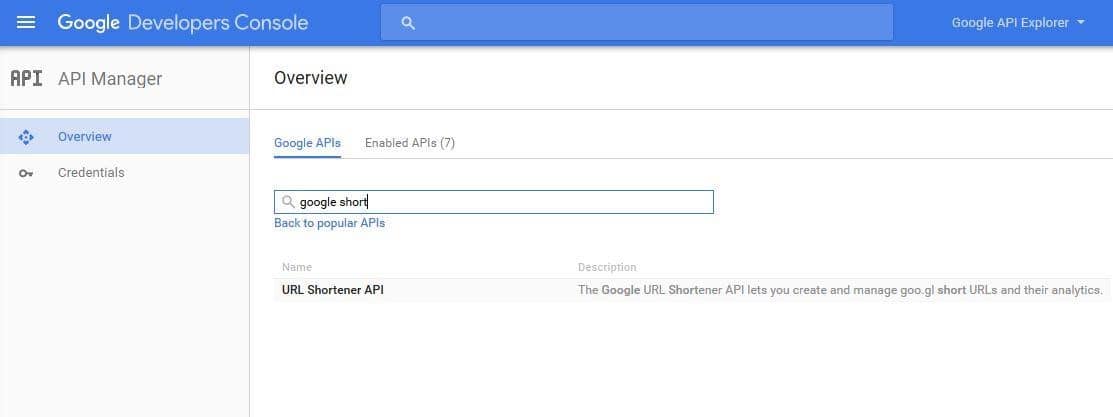
c) In the search box type google URL shortener. Click the URL Shortener API link that is listed in the search results
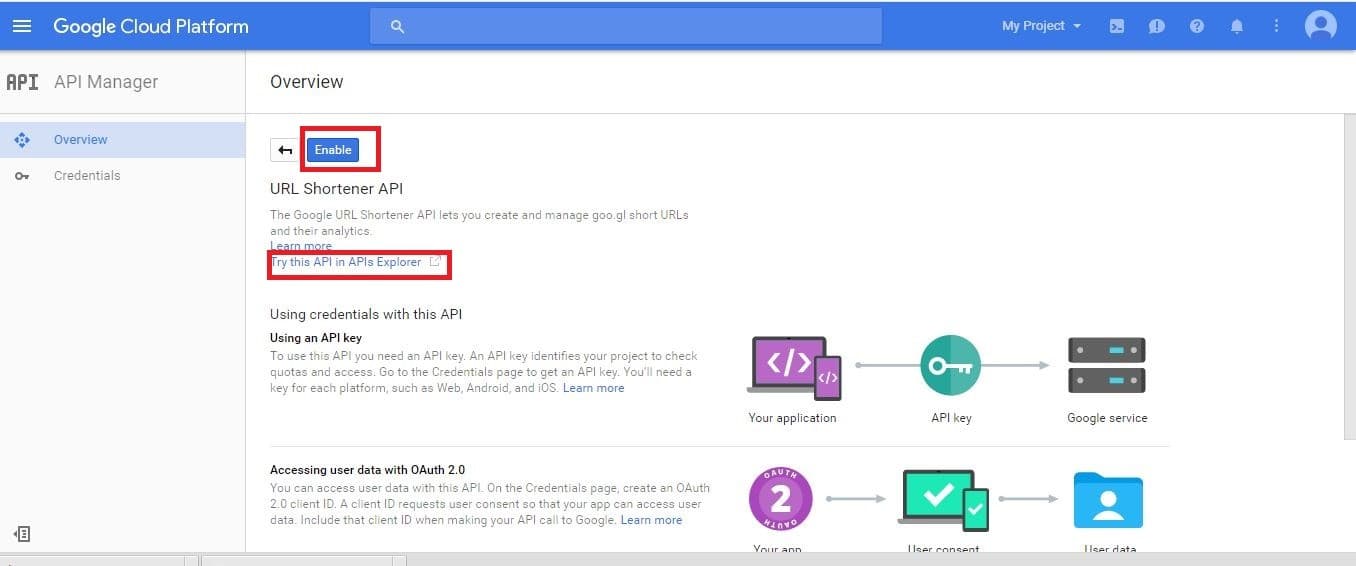
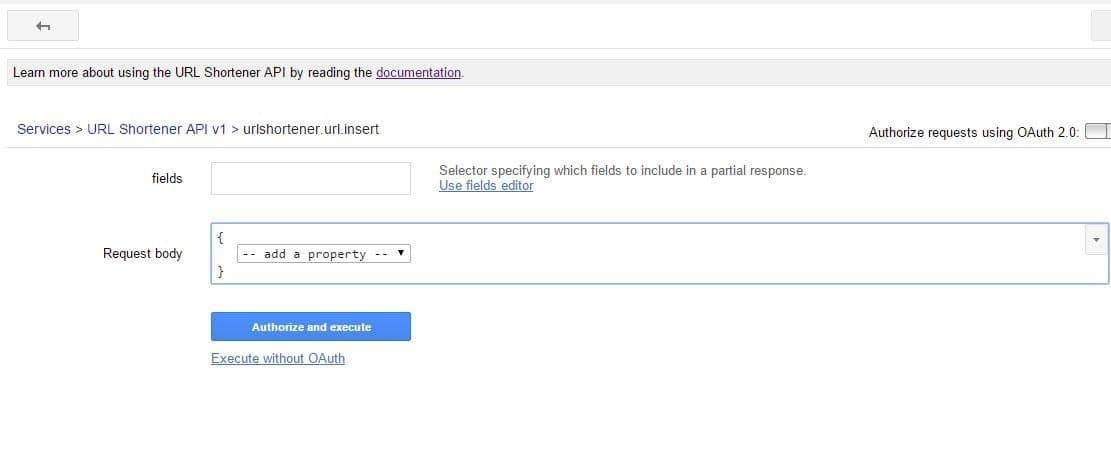
d) Click the link Try this API in APIs Explorer.
e) Click Create a new short URL.
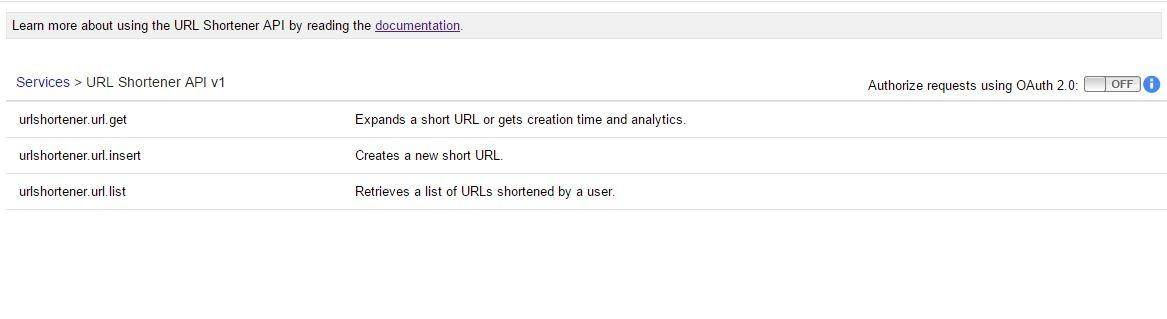
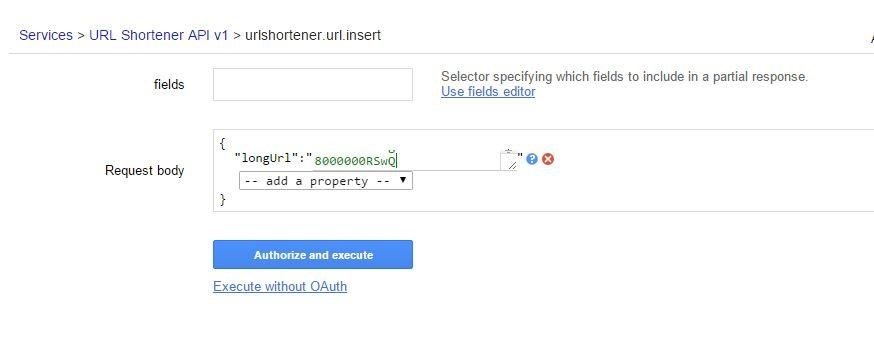
f) Click the drop-down menu and select longurl from it.
g) Paste the long URL that needs to be shortened and click the Authorize and execute button.
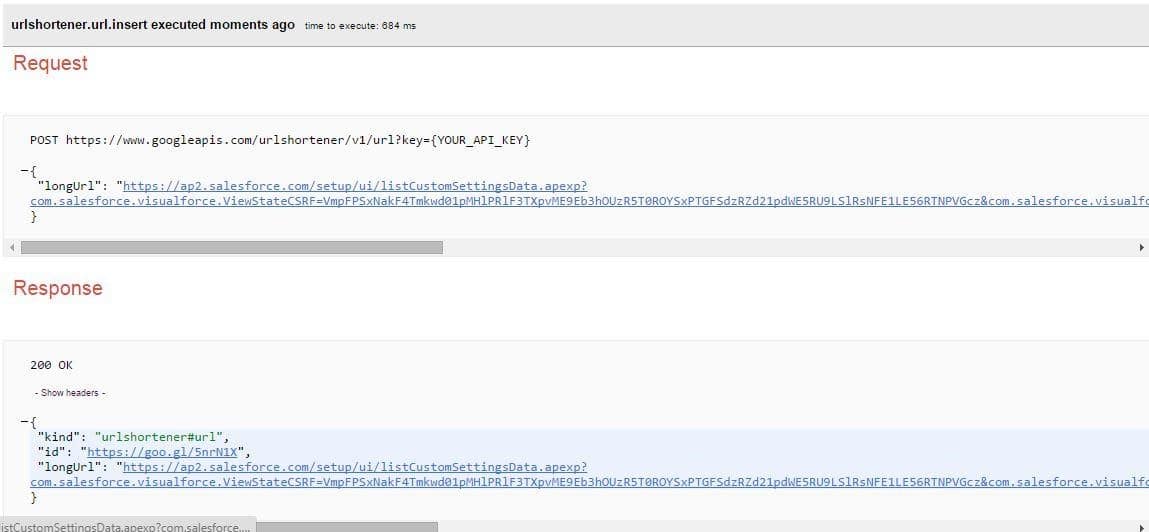
 h) This will give the End Point URL. In the JASON Object, the End Point URL as https://www.googleapis.com/urlshortener/v1/url?key={YOUR_API_KEY}. Next, I need the API key.
Step 3: How to get the API key?
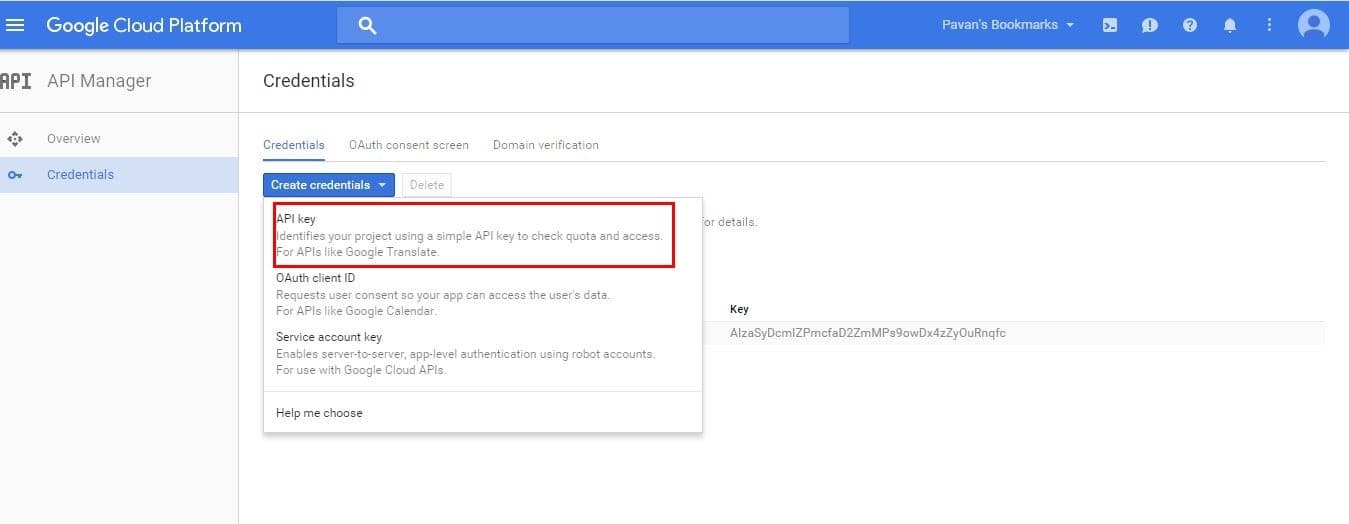
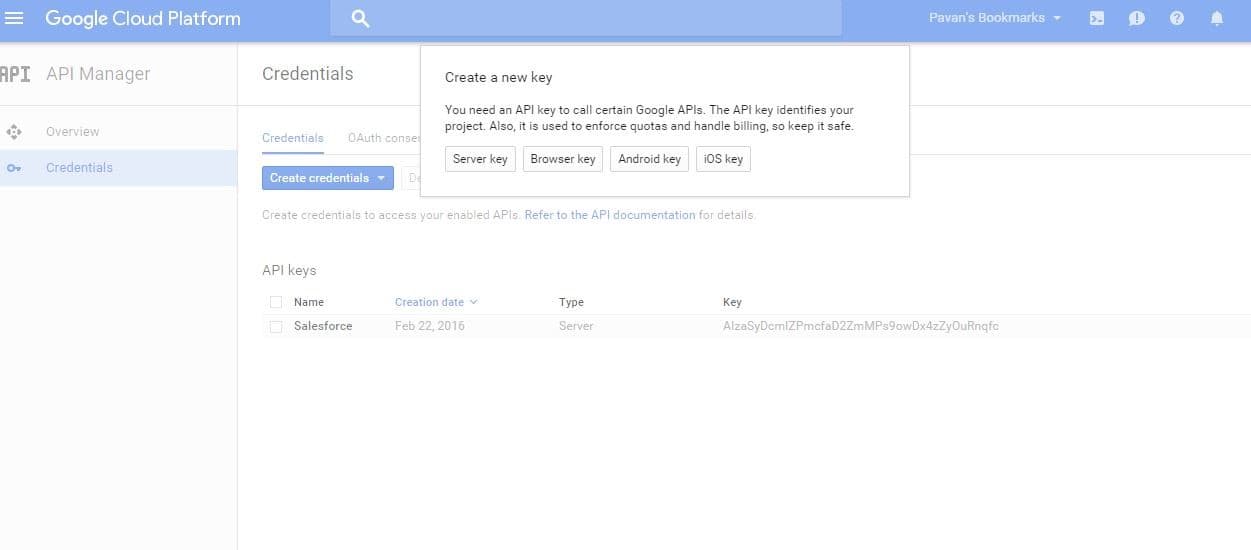
a) Go to Google Cloud Platform and then to API Manager. Click Credentials in the left menu and then API Key in the drop-down menu.
 b) Click the server key as shown below.
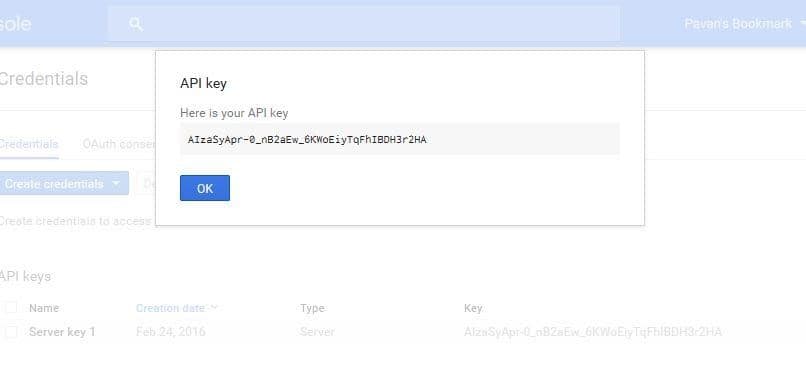
c) Your API Key will be generated
Step 4: Back to Salesforce Org
a) Now that we have the API Key and the End point URL, we can go back to some fun with Salesforce. As you’ll all know by now, here’s the path to be followed: Setup -> Develop -> CustomSetting -> New
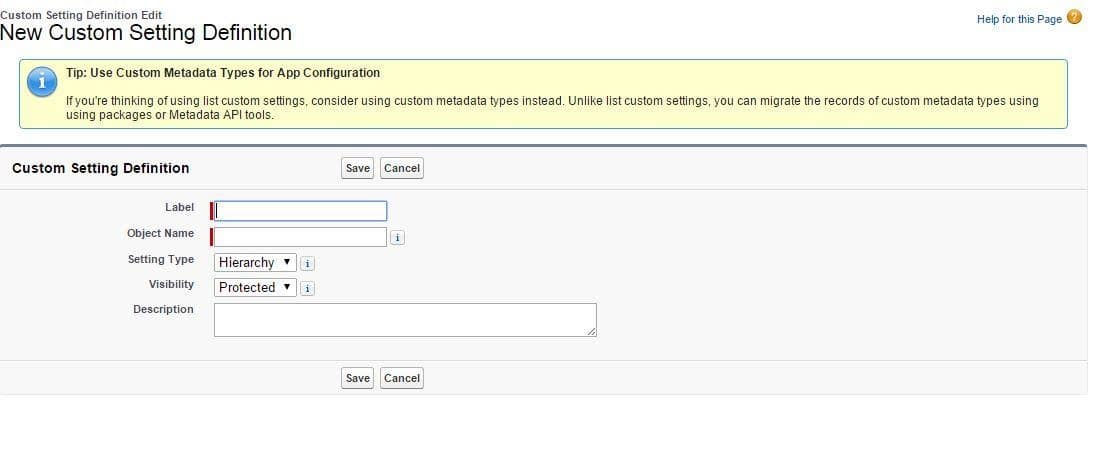
b) Fill the details in the Salesforce Org as follows and Save.

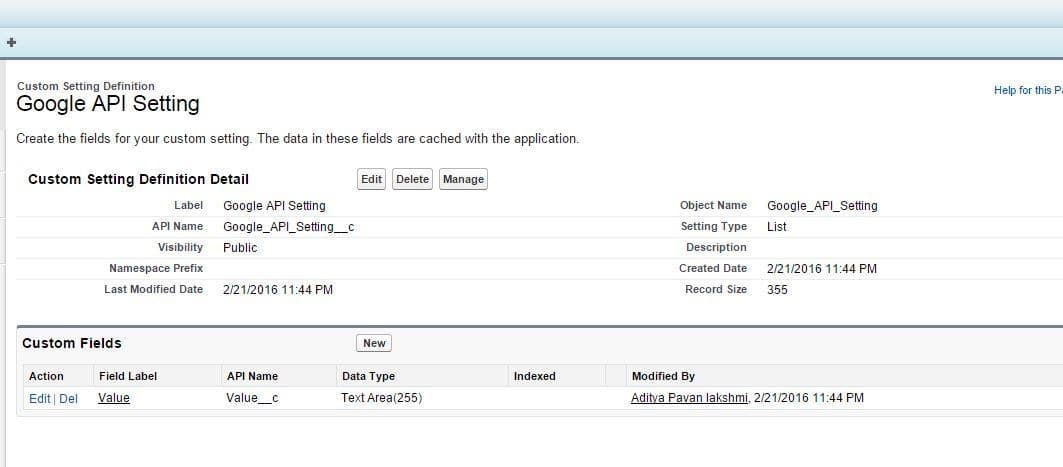
c) Create a new custom field named Value as shown in the below screenshot. Click Manage.
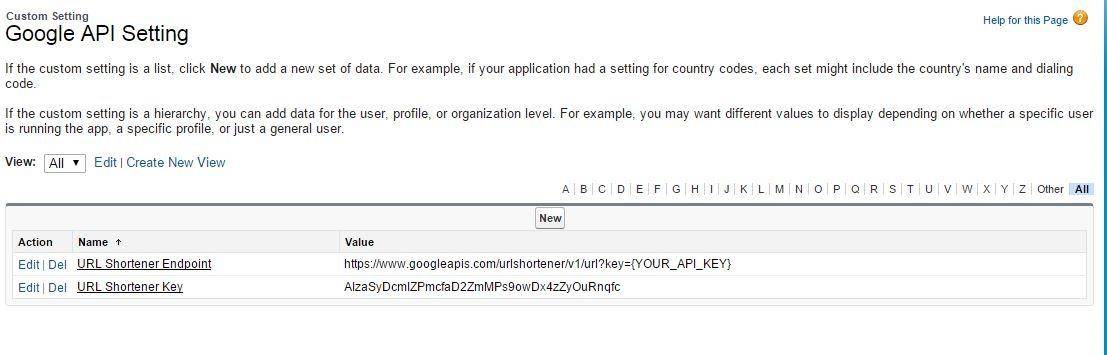
 d) Enter records as shown in the below screenshot. First is the Endpoint for which the URL https://www.googleapis.com/urlshortener/v1/url?key={YOUR_API_KEY} is added in the Value__c field and given the name as URL Shortener Endpoint. We have already generated the API Key. Paste that in the value field of URL Shortener Key.
Step 5: Defining Remote Site settings
a) Almost done with the configurations, so stay with me here! The last part is giving permissions to the Remote Site settings.
Follow this path: Setup -> Administer -> Security Controls -> Remote Site Settings
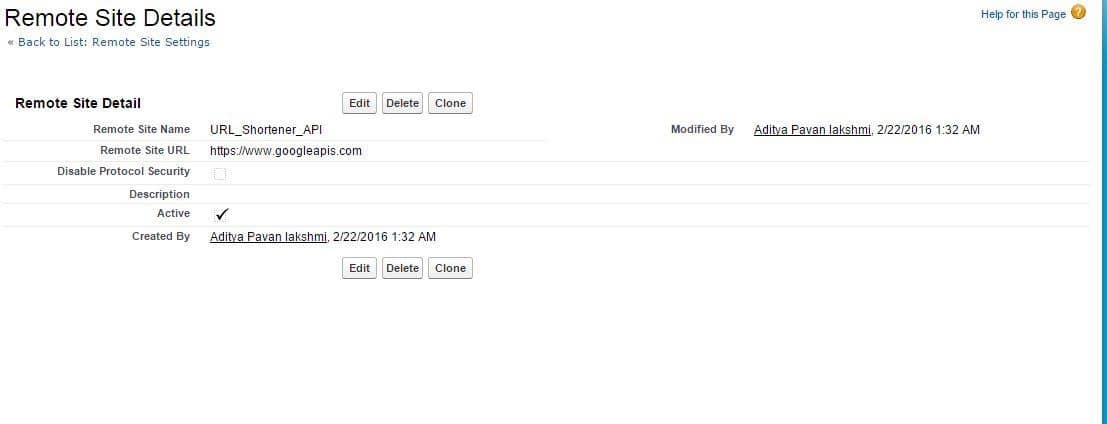
Here the configuration part is completed.
Step 6: Write a web service class and embed it in a button
To make things easier, we now need to create a button such that whenever it is clicked, the URL has to be shortened. In developer language, what that means is an apex class is called when the button is clicked. Since we are relying on an external API, we write a web service class to call an apex class and perform the action in Salesforce. In this case, the web service class is written to call the Google URL Shortener to Salesforce.
Here’s the code that can give you a reference for that.
https://gist.github.com/AdityaPavanVempati/8f4e092d056867246a59
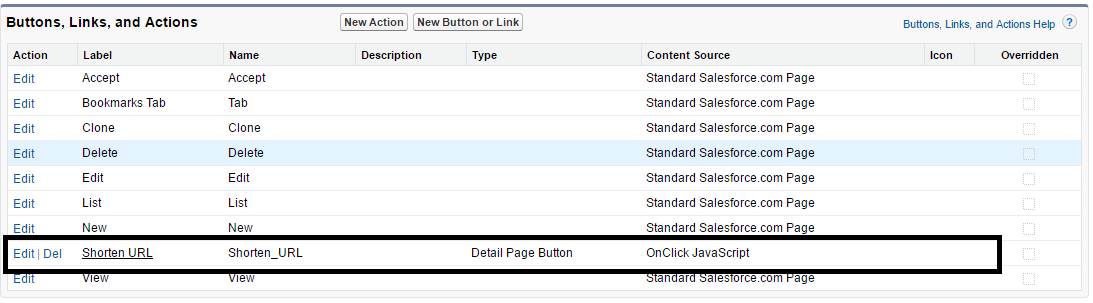
a) I created a button Shorten URL in the bookmark page as shown below.
Go to the Bookmark Object -> Buttons and Links Section -> create a New Button or Link
b) Let’s see the button in action. Upon clicking it, the below screen is what you get. As you can see, there is JSON Declaration that calls the web service apex class.

Here’s the code for that.
https://gist.github.com/AdityaPavanVempati/d4cf86fc53697f982d5a
c) Next, go to the Page layouts and add the custom button which we have created through the Drag and Drop option and click Save.
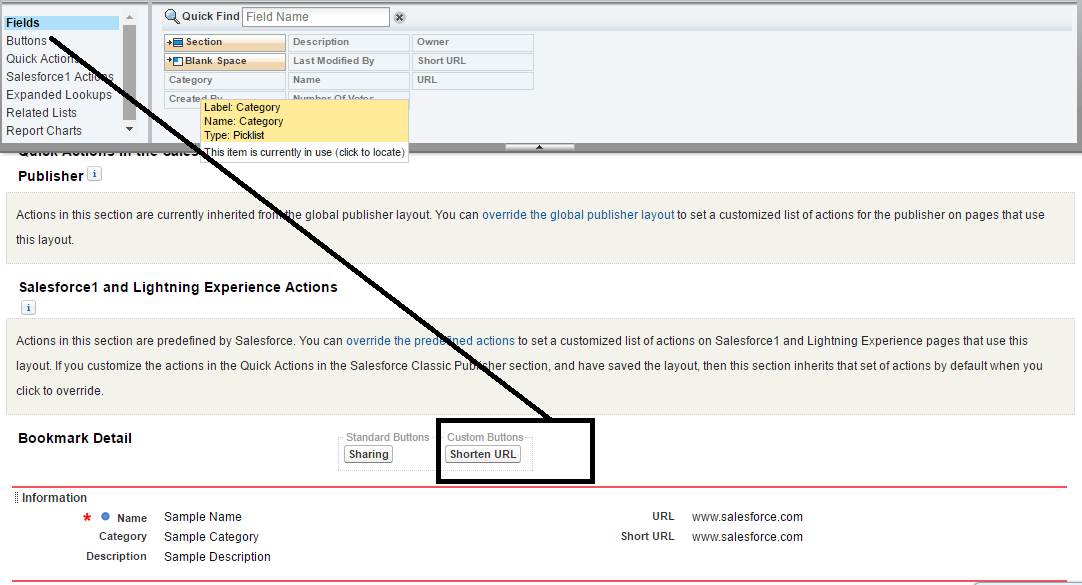
Now, when you save a Bookmark and click the button, the URL is shortened.
Step 7: Create a Force.com site
Currently, each time a bookmark has to be created or deleted, we will have to login to our Salesforce org. This is a cumbersome task. But Salesforce has an inherent solution for that as well. All I need to do is create a Force.com site and make it public. So whenever I need to save a bookmark, I just need to open the page and update it. Here’s how you create the Force.com site.
a) Create the static resource file and save it in Salesforce Org.
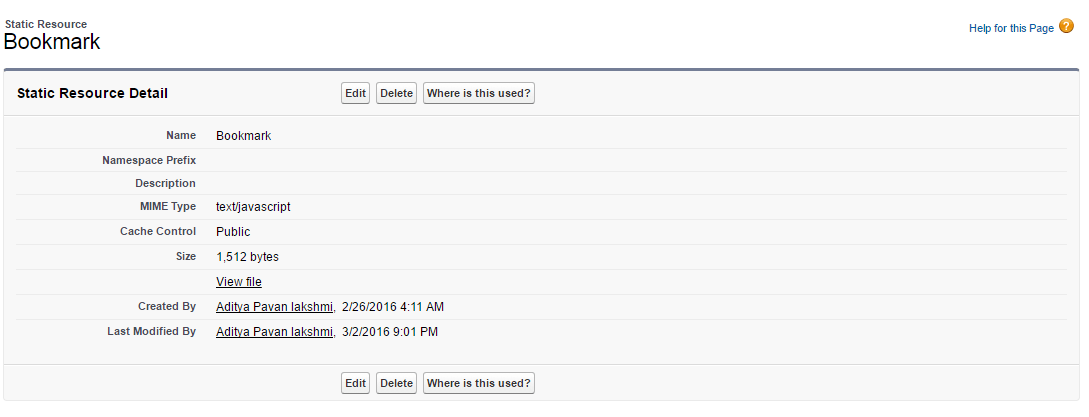
Below is the Static Resource Code:
https://gist.github.com/AdityaPavanVempati/d945638bdae08496b06d16c10ba918f8
b) Next step is for the CSS file Code in the Bookmark Object.

Here’s the CSS code for your reference:
https://gist.github.com/AdityaPavanVempati/ef4c5b2aee67ed0b8fd7aa91d95b8f09
c) To maintain the front-end look and feel of the HTML page, I took the help of Bootstrap and Select2.js
Here’s the code for that.
https://gist.github.com/AdityaPavanVempati/85f06d77181036609d6f2d0f7359e715
d) For the controller actions, you could this code.
https://gist.github.com/AdityaPavanVempati/9110f1e59d5e2485590f8e078e71bb71
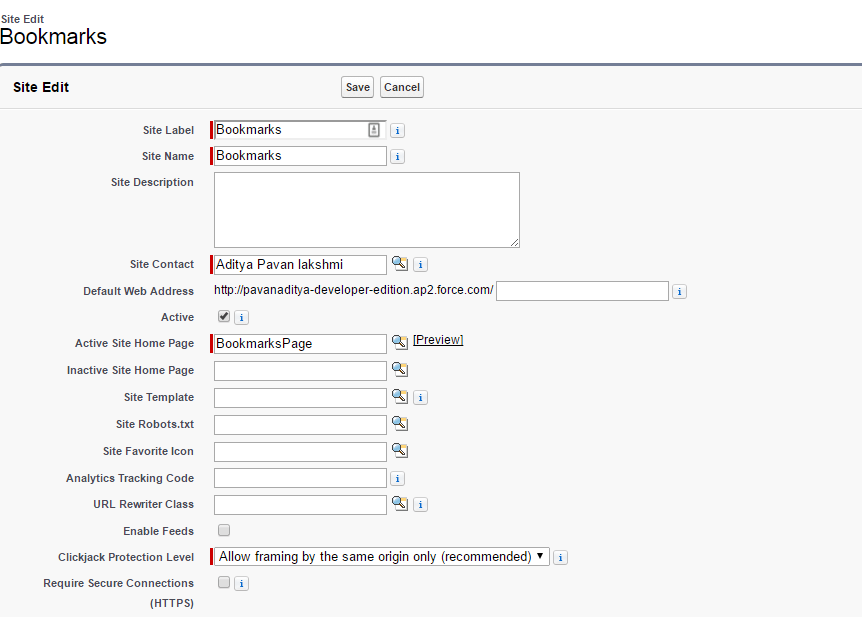
e) Go to sites.com (Setup -> Develop -> Sites -> New) to create the site. Add in details to the fields, I’ve included a screenshot below which can be a reference for you while doing it.
Note: Site.com from Salesforce is a great tool that lets you build and deploy websites easily and with least amount of coding. Don’t you just love Salesforce!
f) Click the Save button. And you are done!
The Site which you created should look similar to this
https://c.ap2.visual.force.com/apex/BookmarksPage

See why I told you it was easy! Do make sure you try this out and let us know in the comments section below.