The Beginning
Here is a great free app which can help with one of the regular issues in Salesforce, the storage limits! Storage Helper can help you keep track of your data limits and further automate deletion of records to keep you within the set limits. For those of us who have to regularly clean out old records this could be very helpful. The app was launched on 26th Sep 2016 by Passage Technology.
What you Need to Know
The app helps to automatically delete old or unnecessary records from any object, thus helping you free up your data storage within a few clicks. It safely deletes the Salesforce data and has optional built-in storage backups which will be in your Salesforce environment as .csv files.
What is the Old-School Way of Doing Things?
Previously we deleted records manually; if we had to delete some specific records we had to search for every record and delete them manually.
How does the Appy Ninja Help?
I find the Storage helper app to be very useful to delete unnecessary data in our org. Here are just some of the storage jobs that have been created and scheduled to run by the app:
1) Remove exceptions/error logs and other cached records generated by applications.
2) Safely delete Salesforce data using this app with optional built-in storage backups that will be stored in your Salesforce environment as .csv files.
3) Saves you money: Save significantly on Salesforce data storage fees.
How does it Work?
You can mass delete activities, emails, cases, accounts, contacts, or any other custom objects or Standard Objects with this app. The best part about it is the easy filtering on the jobs. You can keep your org free of unwanted data and take backups of deleted records and store them as .csv files. Later on if necessary, we can restore those deleted records into the database. To strengthen the level of security, they have provided the facilities to preview your records before running the Storage Recycle Job. This helps you verify whether you have selected the correct criteria.
The Real Life Scenario
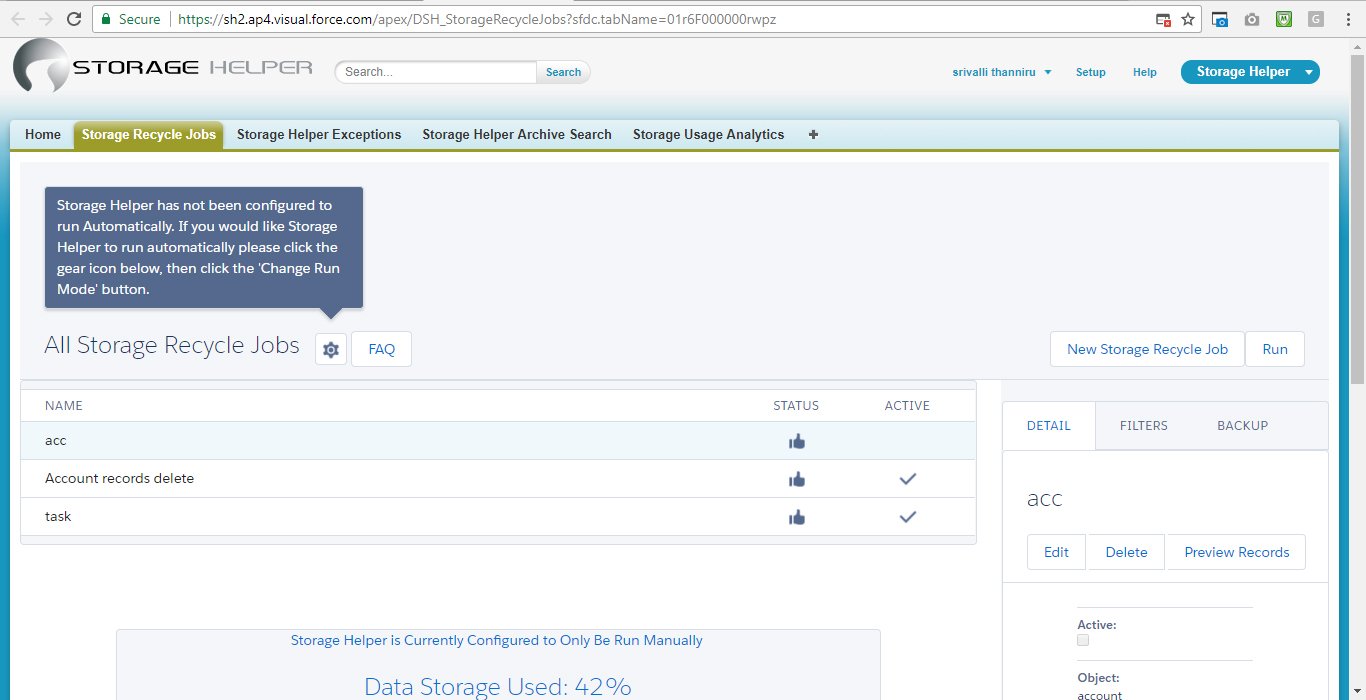
1. Create Storage Recycle jobs to delete data that you no longer need.
a. Click the new Storage Recycle Job button on the upper right hand corner of the Storage Recycle Jobs page.
b. Create the Storage Recycle Job.
- Enter the job name.
- Select the Object to clean up.
- Add desired notes.
- Mark as select for Hard Delete Records.By selecting this checkbox, records will not be sent to the recycle bin.
- Select Child Objects to be deleted along with the parent. If they are not selected, they could block the parent record from being deleted.
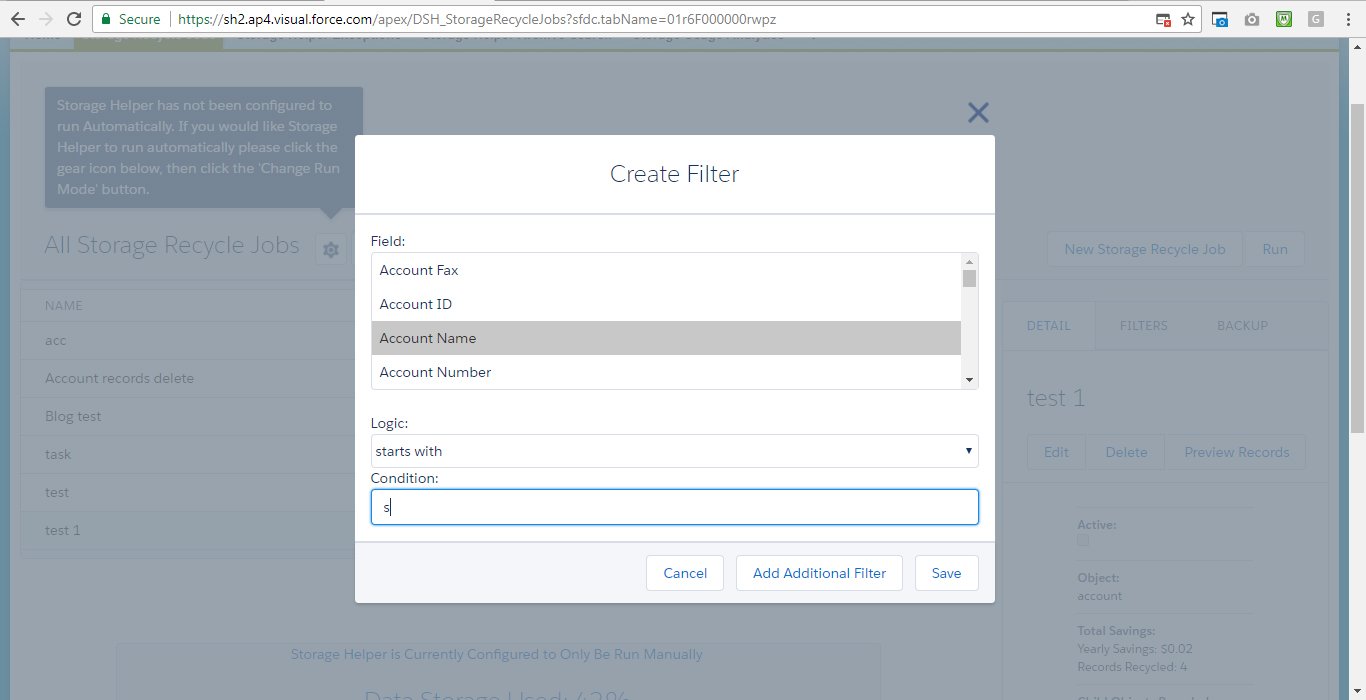
- Create desired filter criteria to ensure the correct records are deleted. You will need to select the field to filter on, choose the filter logic and select the condition that need to be met. Here we need only those records of the ones that start with S.
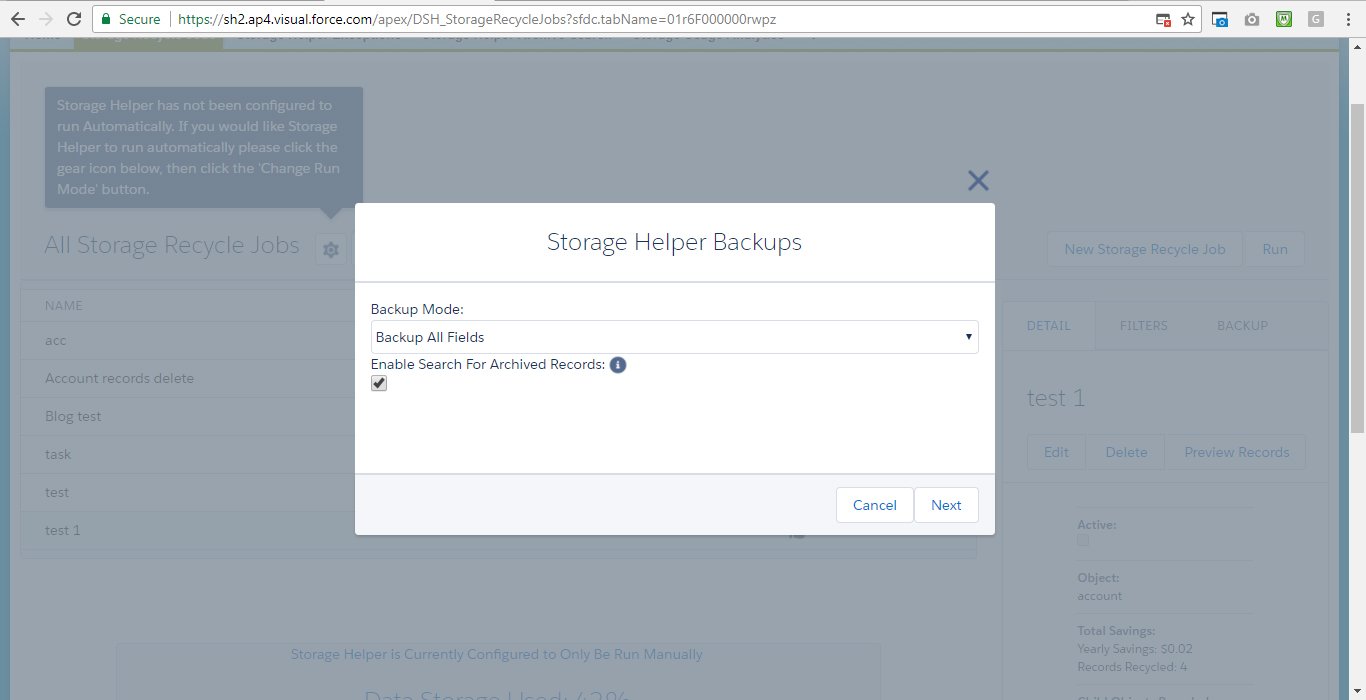
- Select the Storage Helper Backup mode. If configured to do so, Storage Helper will back up just the records that need to be deleted into .csv files.
Please note that this does not back up all of your data, but only the records to be deleted by Storage Helper. Although it is not necessary, it is highly recommended to backup all of your Salesforce data, not just the records that Storage Helper touches.
4. Mark as select for Hard Delete Records. By selecting this checkbox, records will not be sent to the recycle bin. This is best to leave this option to uncheck for the added level of safety. It is better to store the deleted records in recycle bin.so that we can verify the records before deleting them permanently. So better don’t select Hard Delete Records checkbox.
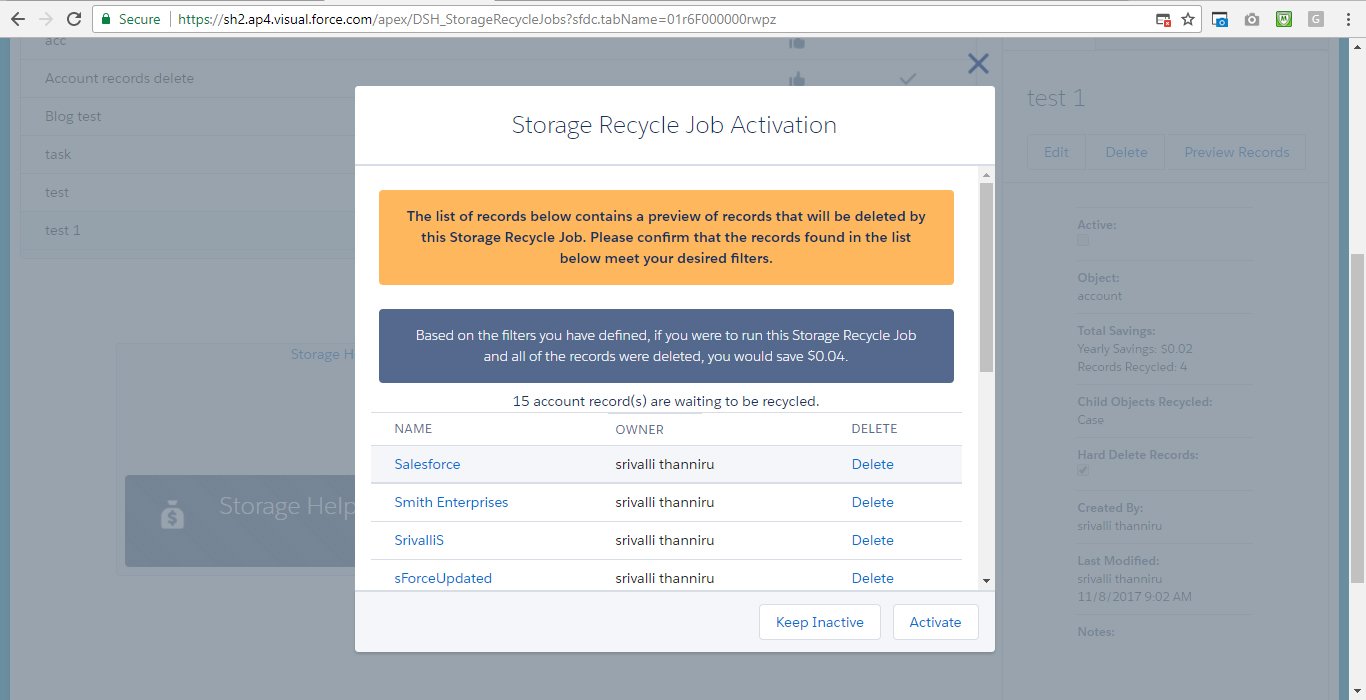
Here there are 15 records whose name start with S in account object.
Click on Activate Button
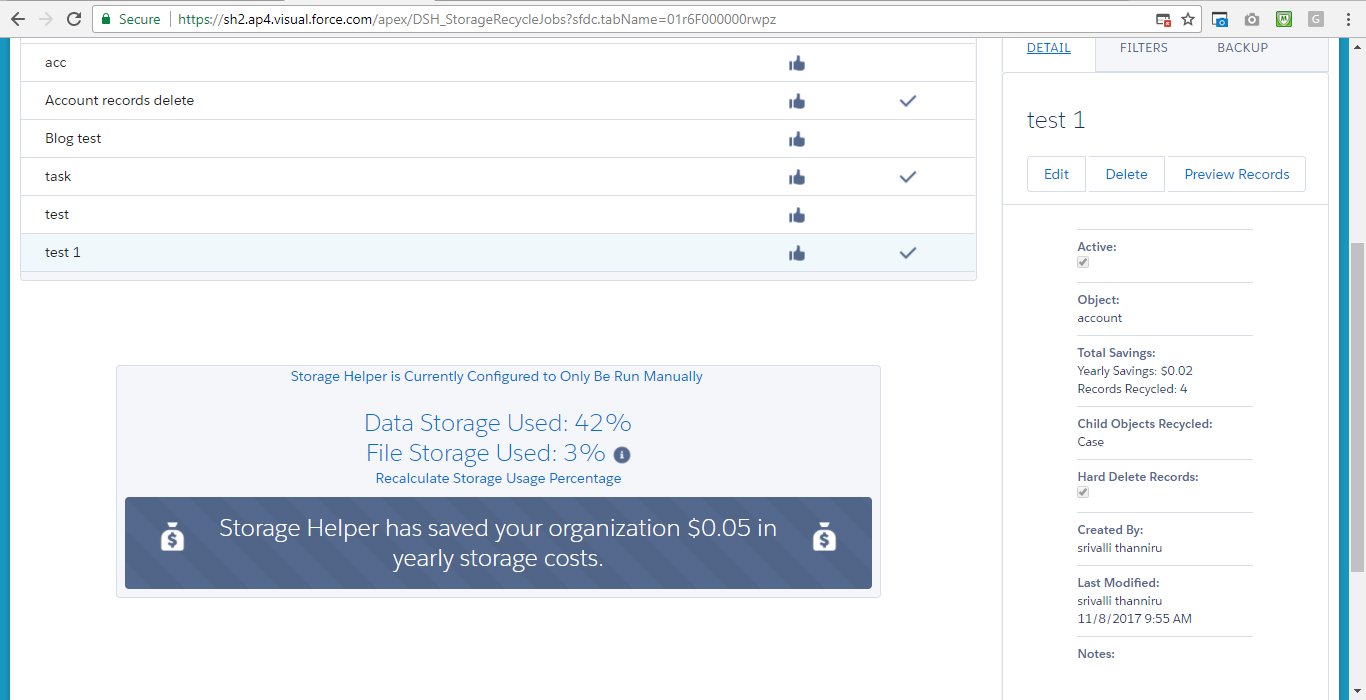
5. In the Detail tab to the right,you can preview records waiting to be deleted by a Storage Recycle Job, edit, or delete the job.
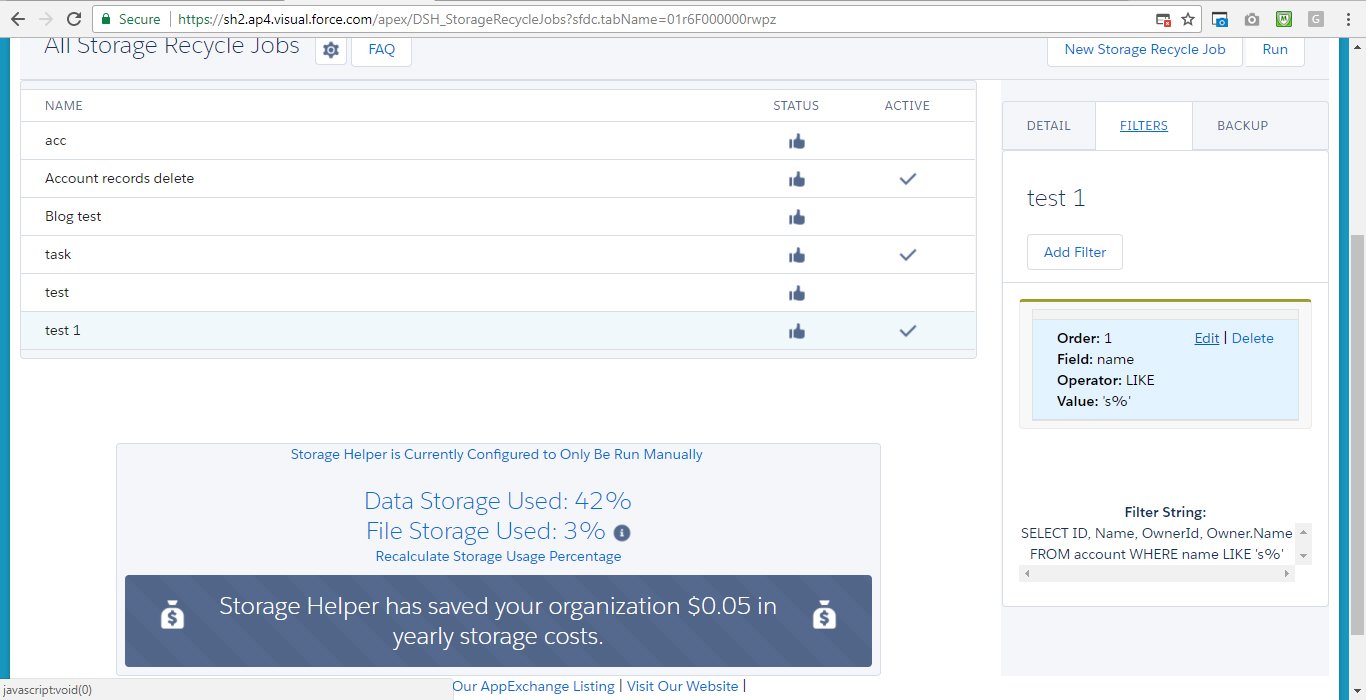
6.Click the Filter tab on the right and you can review your criteria and edit/delete, add new criteria, or change your filter logic.
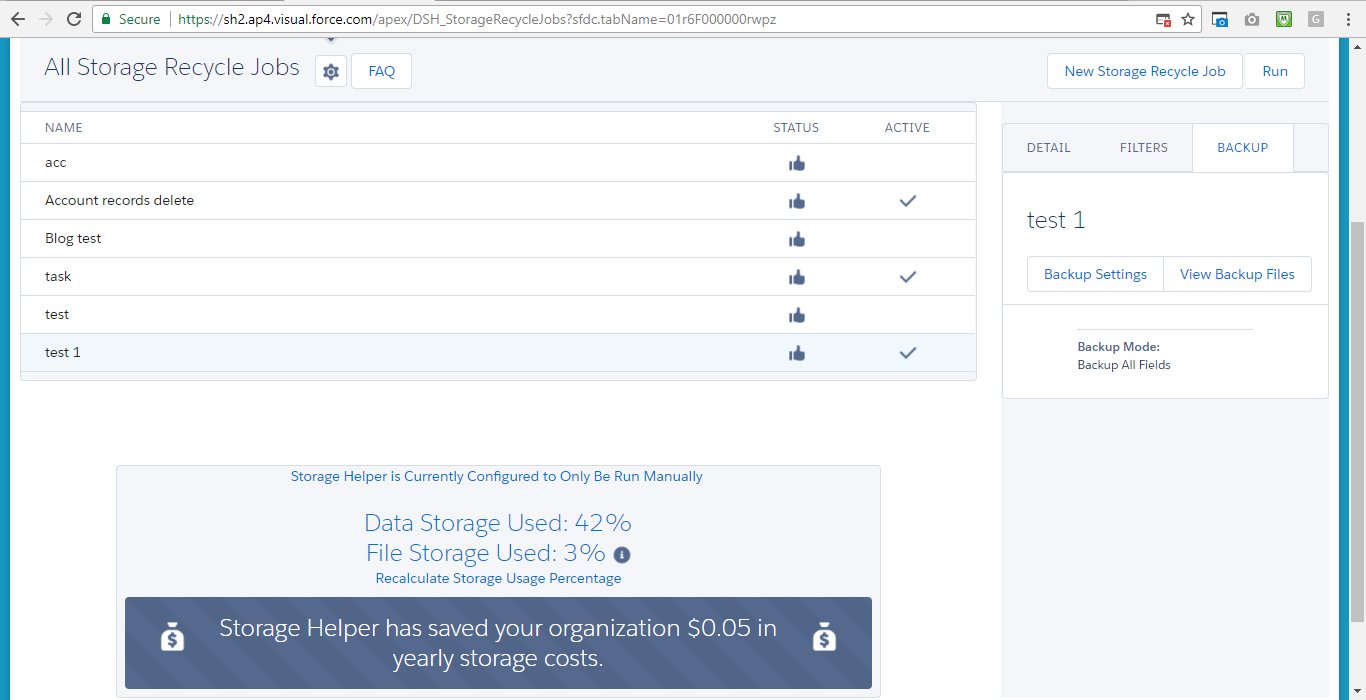
7. In the Backup tab to the right, you can select your backup mode and view your backup files after running the Storage Recycle job by using the View Backup Files tab.
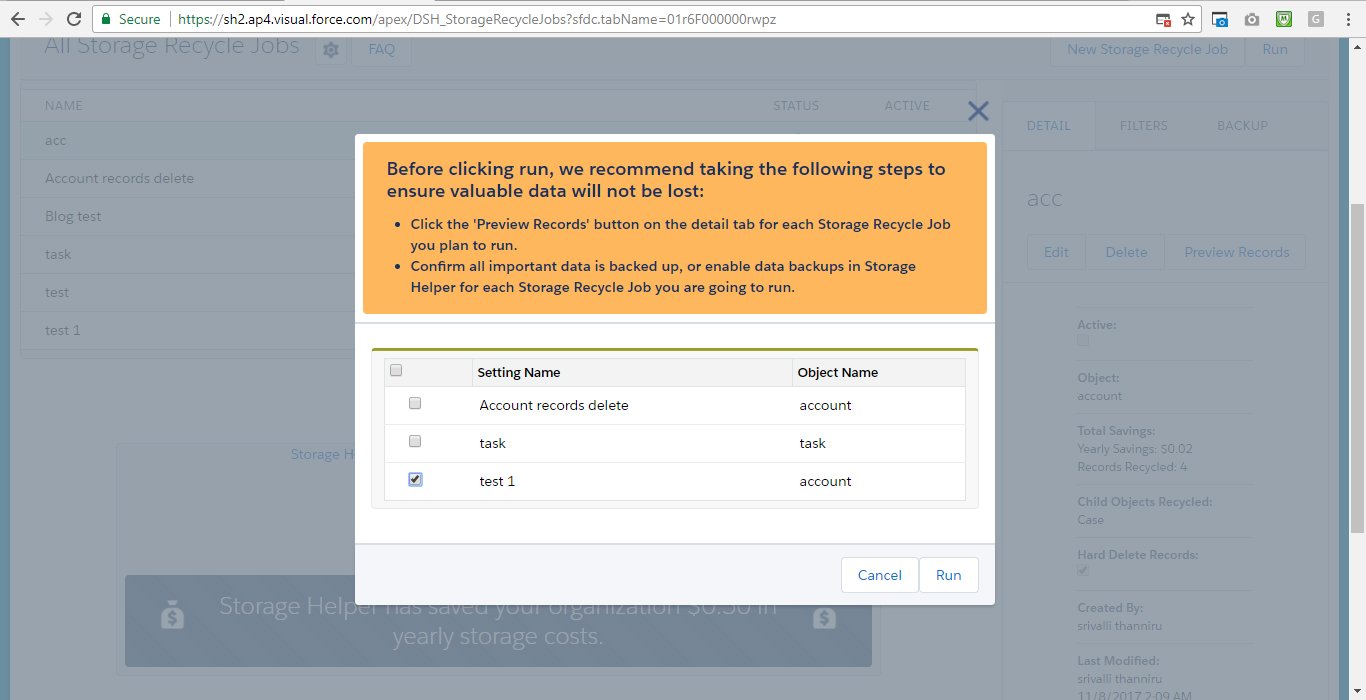
8. Click on Run button on the right side.
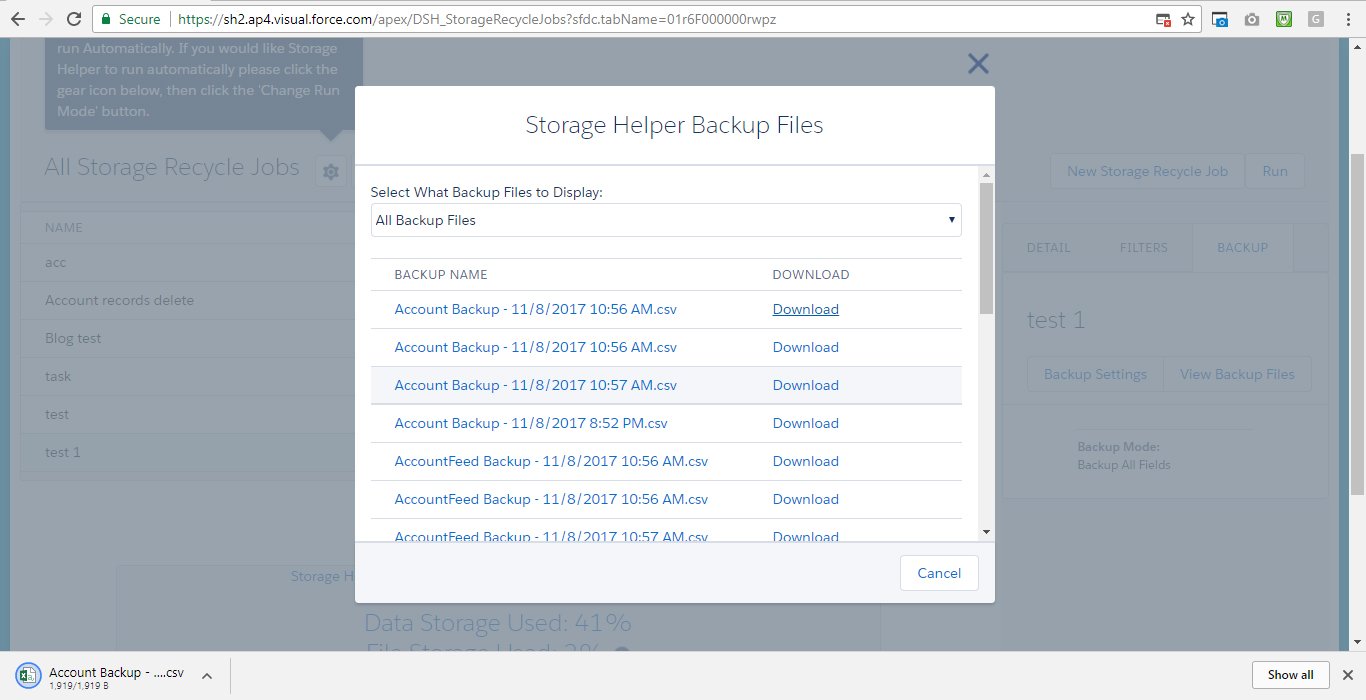
9. After run click on Backup–>View Backup Files–>choose “All Backup Files” and Download all the files.
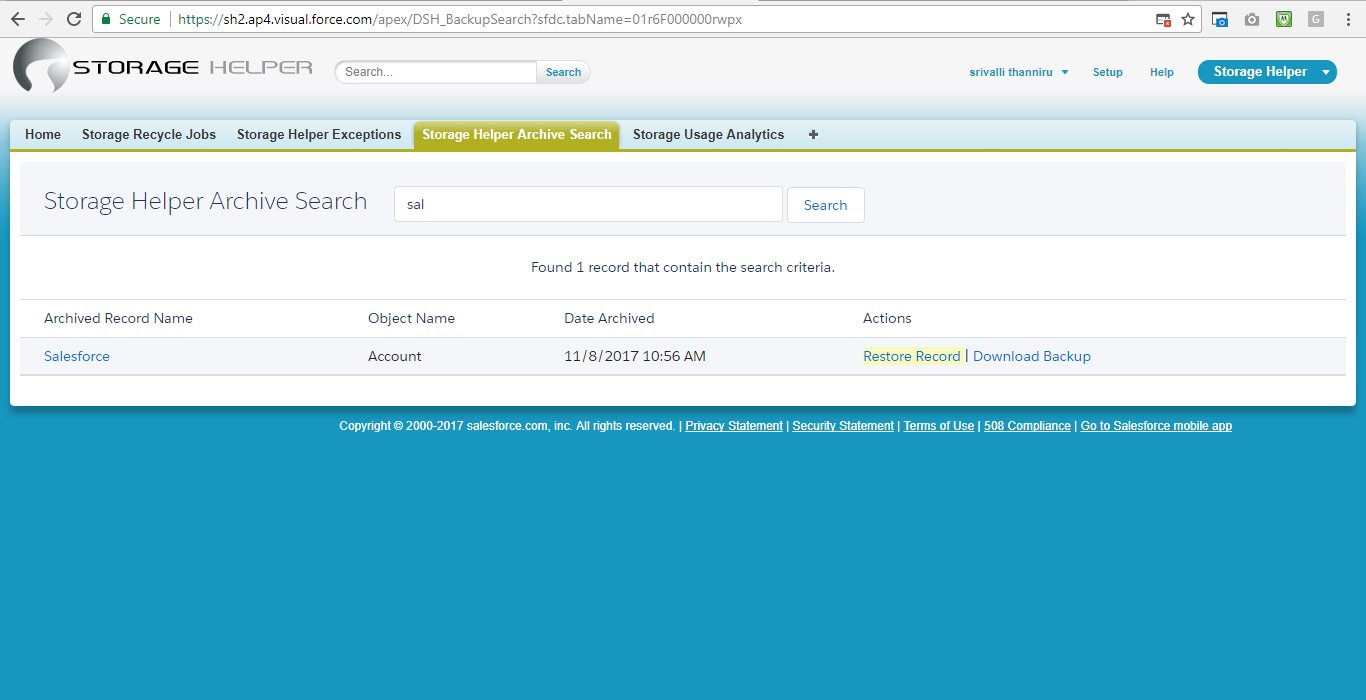
10. Now the records are deleted from the Database. Incase you want to restore some of them, click on “Storage Helper Archive Search” and search for Account names that start with “S” alphabet, for example: Salesforce.
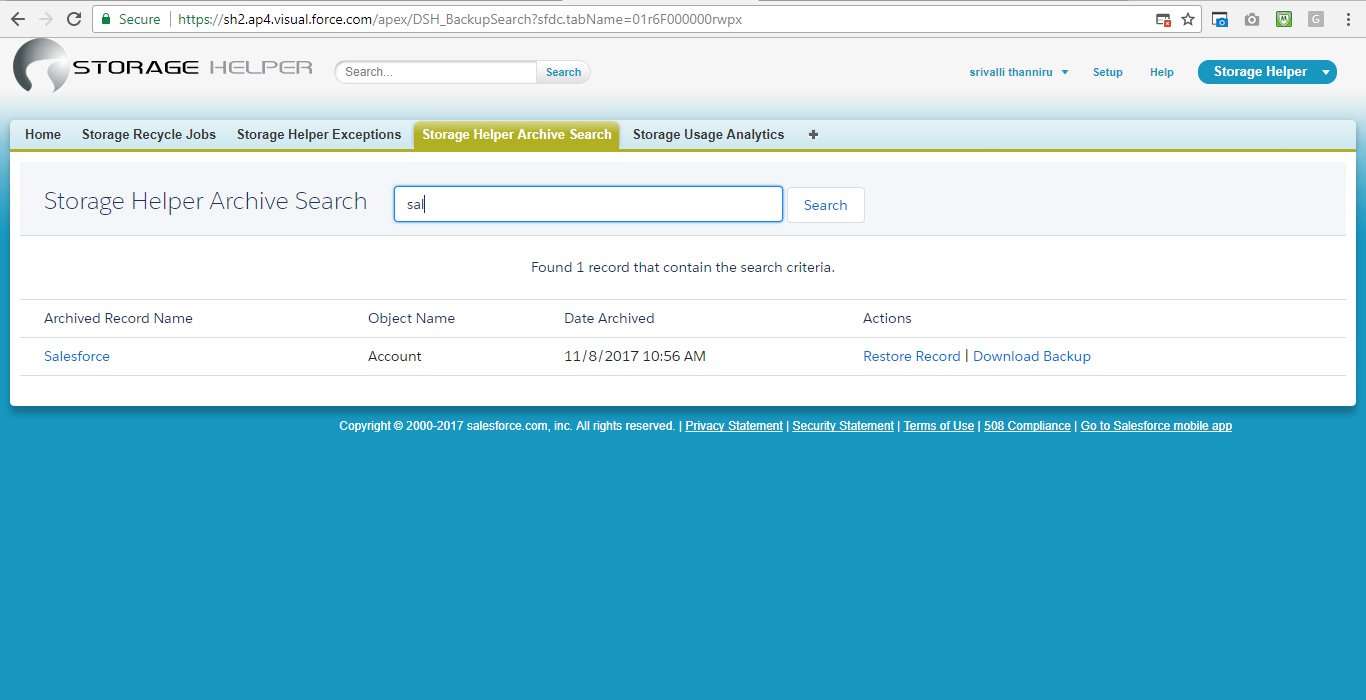
Click on Salesforce Record.
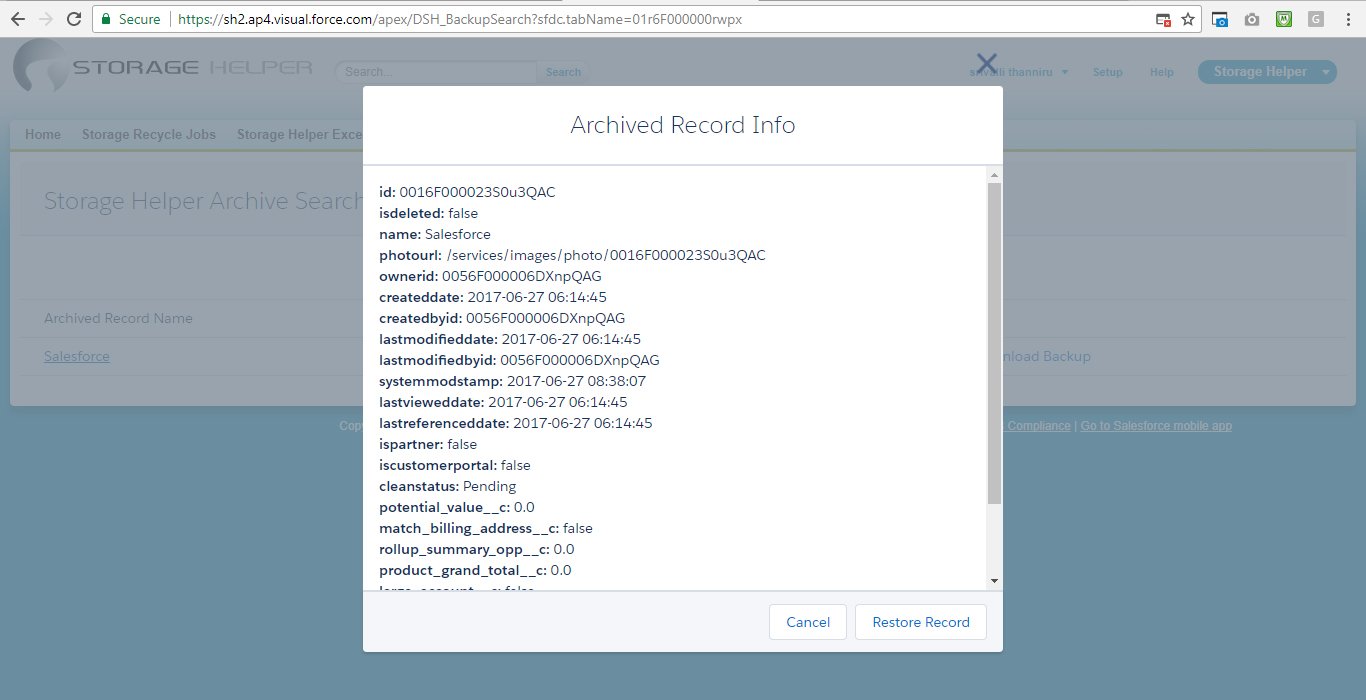
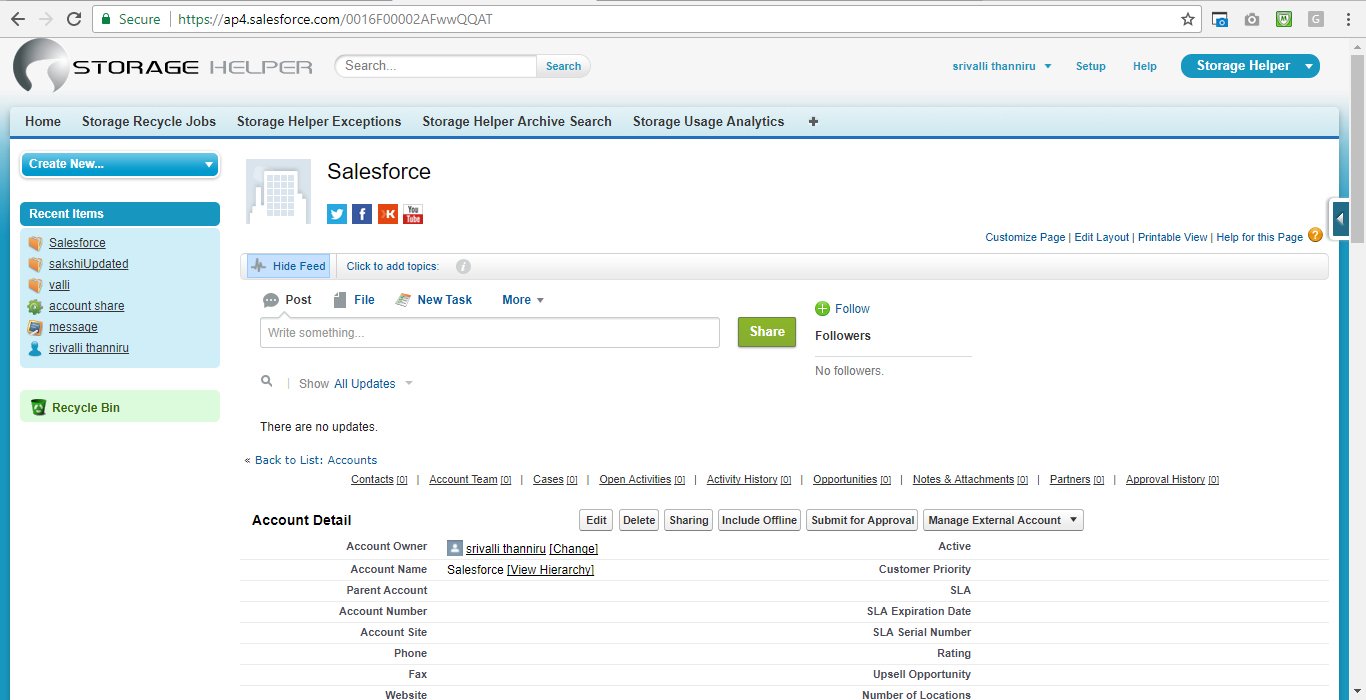
It will show all the information of the record. Copy the Account Id and search for this account in the database.
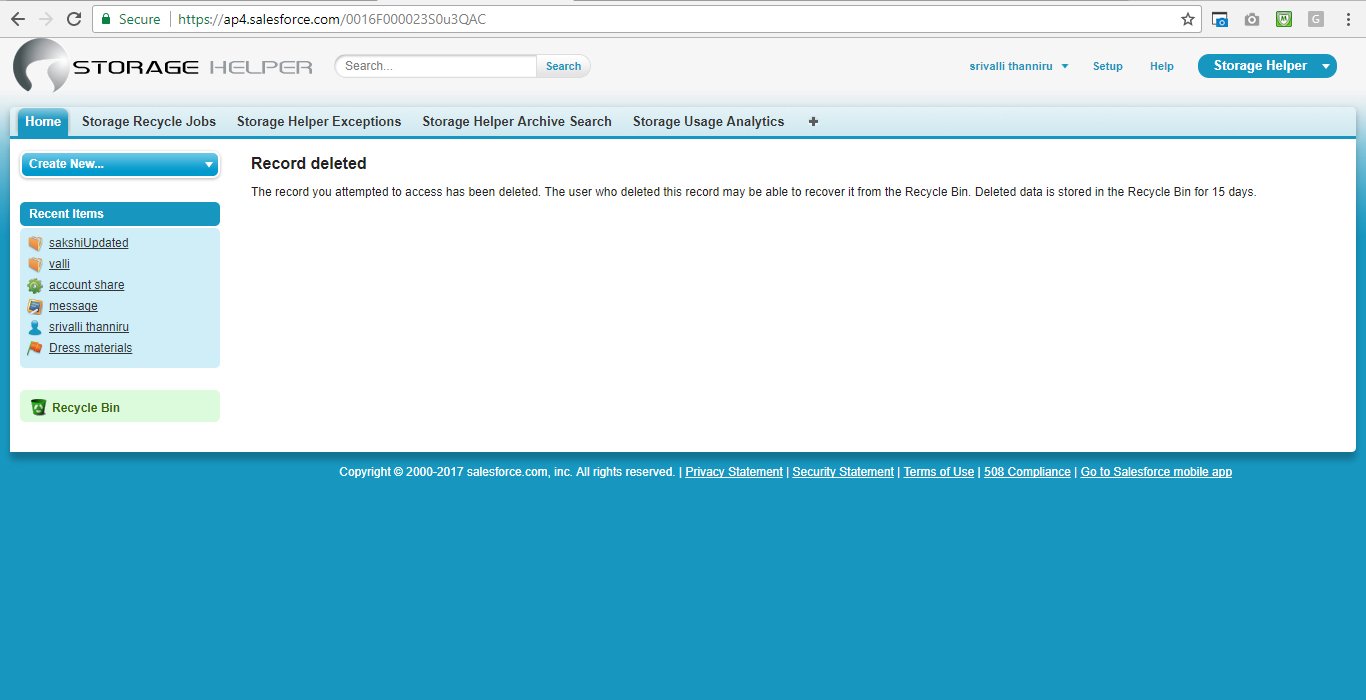
The record gets deleted from the database, if you want to restore the record just click on Restore Record.
After clicking on the button it will appear like on the image. Click on Restore Record.
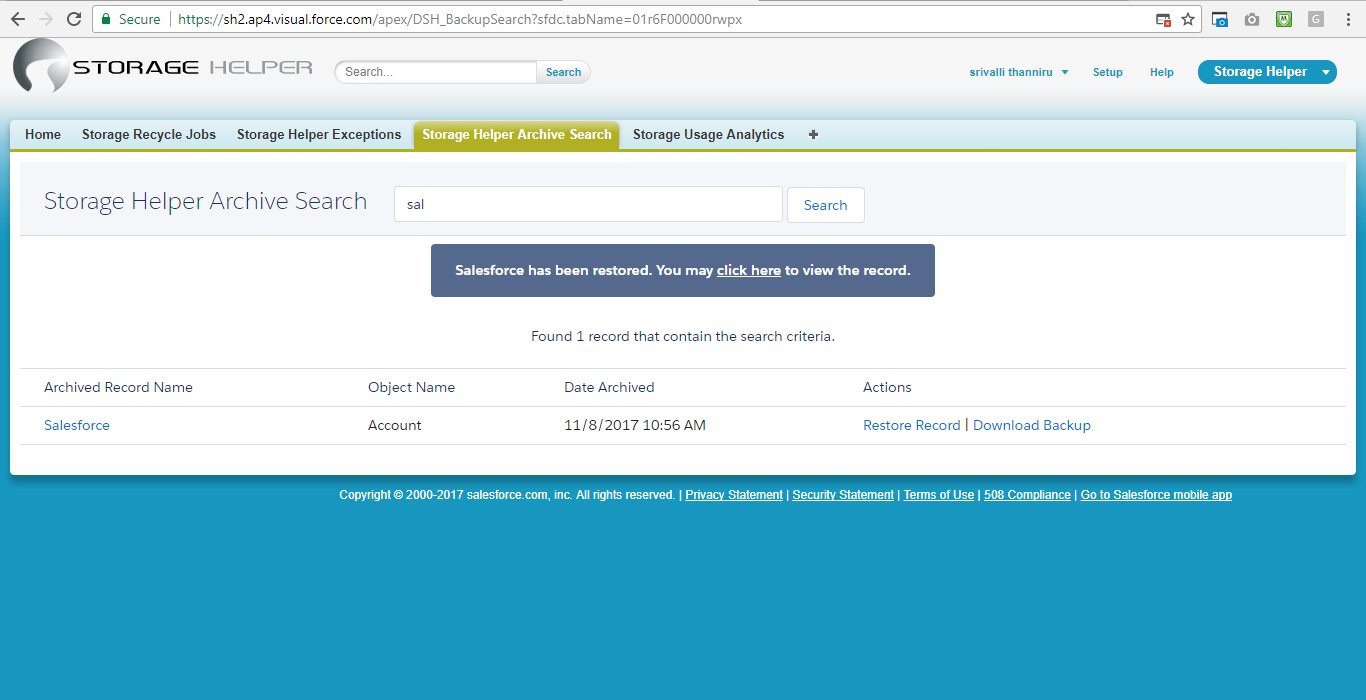
The record gets restored and you click on “Click here” link to view the record.
Conclusion
Storage Helper is a great investment and worth the time to explore how to reduce your costs! It is not only affordable but also easy to use.